HP Pavo Blog for OpenCart is a module that can be used to add blog article features on the OpenCart website, the main feature of this module is like a blog system in general and is integrated with the default features of OpenCart. This article will present a guide to using the HP Pavo Blog module from installation to configuration and the features provided.
Pre Install
- Please follow pre install section here if you haven't proceed one before: https://hpwebdesign.io/pre-install
- After completing the above steps, you can proceed with the installation as follows:
NB: You can disable base theme modification after installation.
Installation
- After purchasing the HP Pavo Blog Module, you will receive a file with the name XXXX.ocmod.zip format.
- Navigate to page Extensions → Extension Installer, then upload the file with the name XXXX.ocmod.zip earlier.
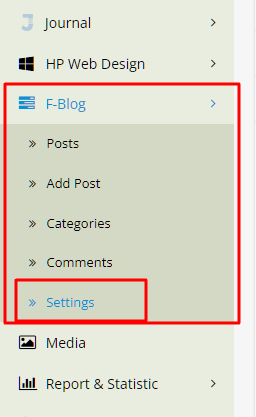
- Open page Extension → Modification then click the Refresh button to apply changes to the system, the Pavo Blog menu will appear on the left.
- Navigate to page System → Users → User Groups → click the Edit button on the User Group Administrator. Click Select All in Access Permissions and Modify Permissions then save.
- When you navigate to Pavo Blog → Settings, the following page will appear.
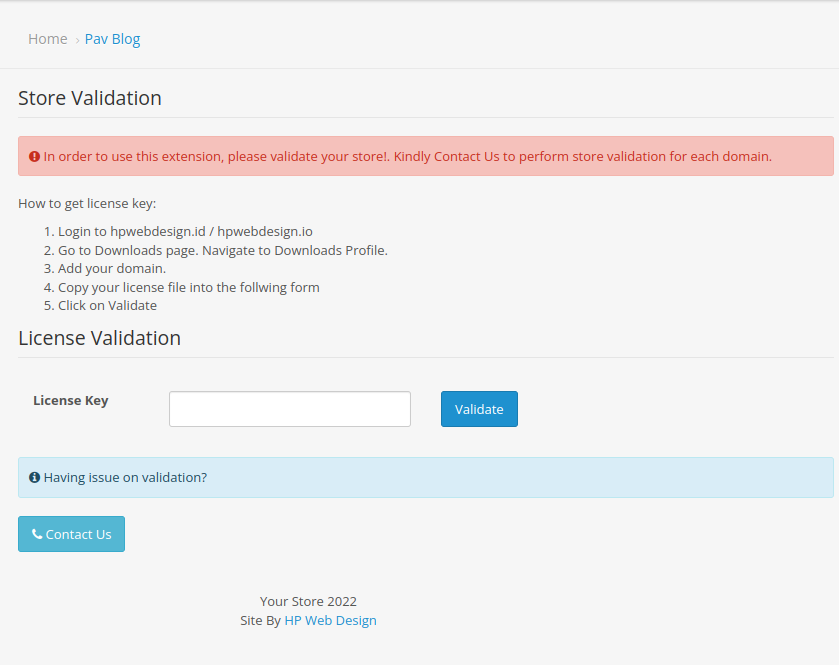
- That's because, every purchase of premium opencart extensions on HP Web Design will have its license validated when you want to use it on the website, this validation is done in connection with the per-purchase license limit. An article about the validation process can be read at the link https://hpwebdesign.io/how-to-get-license-key
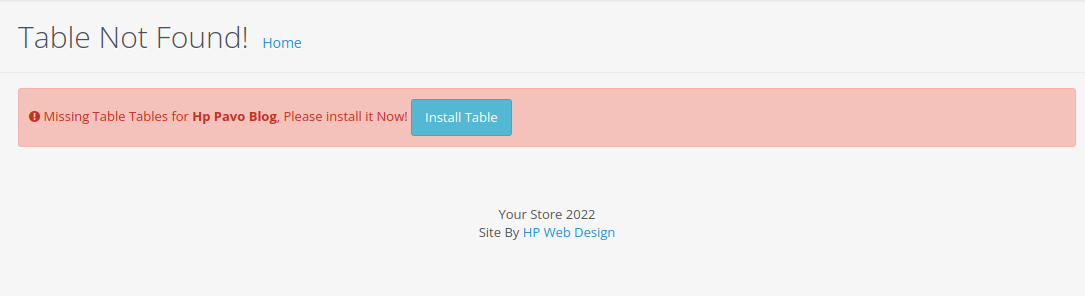
- After the validation process is successful, the HP Pavo Blog module settings page will appear, but before the settings are displayed you need to click the install table button first.
This is the HP Pavo Blog module installation guide.
Configure the Pavo Blog Module
The following are the menus that can be accessed on the left menu.
For the first time installation, please navigate to Pavo Blog → Settings. The settings page will open as shown below, you can start with set enable module to green position to enable all features in Pavo Blog module.

From the above settings, we suggest that you turn all the buttons to green, then set the seo url as per your wish.
We provide article integration with disqus so you can replace our module's built-in comments feature with your own disqus comments.
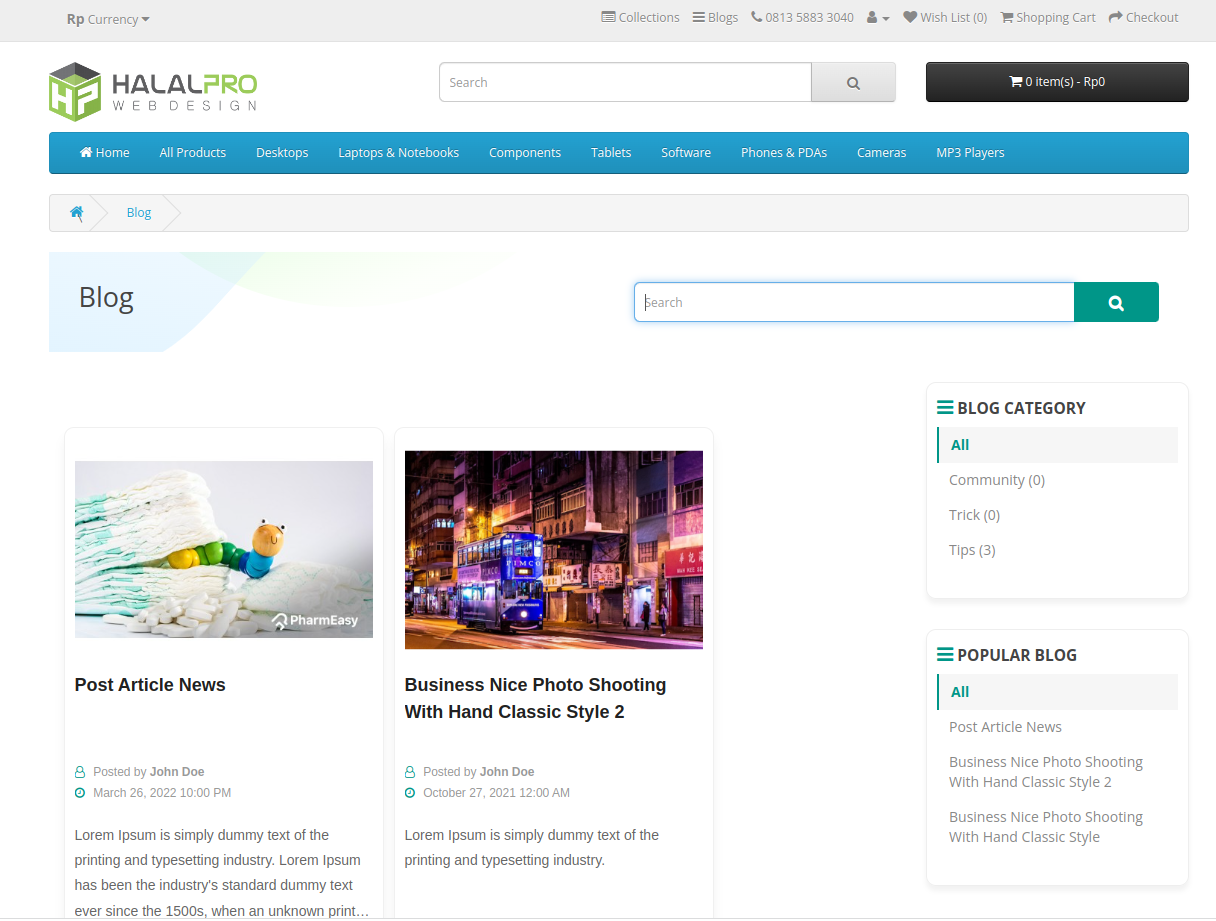
It should be with the settings described above the HP Pavo Blog module is already active for your website, please test it by visiting https://yourdomain.com/{seo_url}, if it looks like this below then the installation is successful
Configure .htaccess to generate a sitemap
Before we do anything, it is suggested that you back up your htaccess so that you can revert to a previous version if something goes wrong.
1. Log in to your control panel.
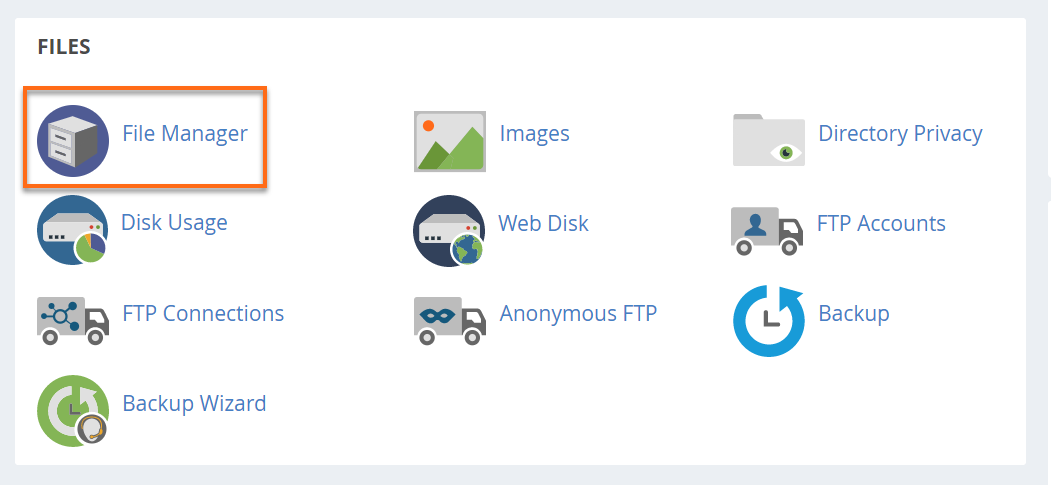
2. In the Files section, click on File Manager to open.
3. The File Manager displays different folders or website directories and website files - some of which are hidden. Select the directory you wish to access.
4. To see the .htaccess file, click Settings in the upper right-hand corner.
5. Make sure the Show Hidden Files (dotfiles) are checked. This will refresh the page, and all files starting with a . (dot) will be displayed.

6. Click Save.
To edit the .htaccess File:
1. If you have a single domain, go to public_html to find the .htaccess file. (If you have other domains, access that domain's document root to edit the .htaccess.).
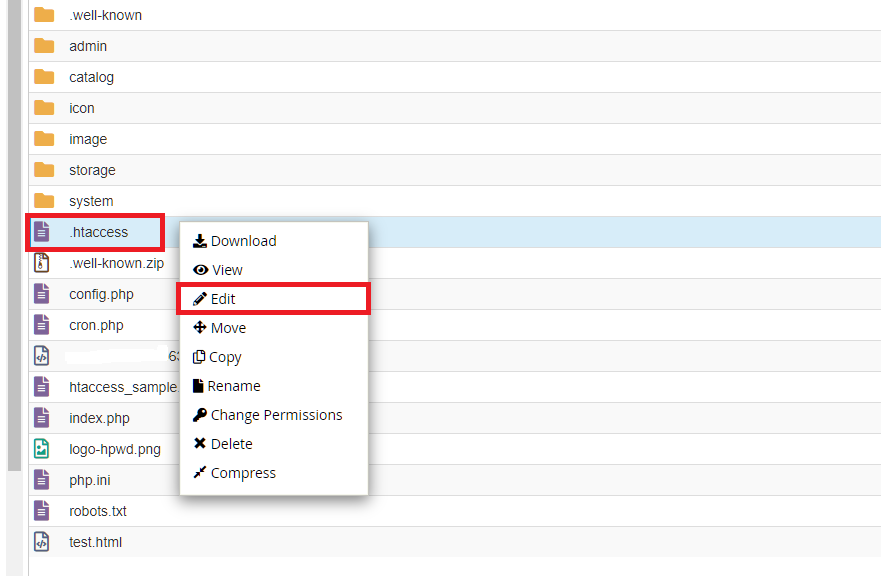
2. Right-click on the .htaccess file and click Edit from the menu. Alternatively, you can click on the icon for the .htaccess file and then click on the Edit icon at the top of the page.
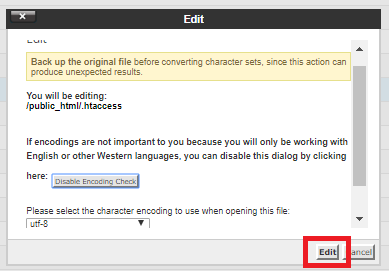
3. A dialogue box may appear asking you about encoding. Just click Edit to continue. The editor will open in a new window.
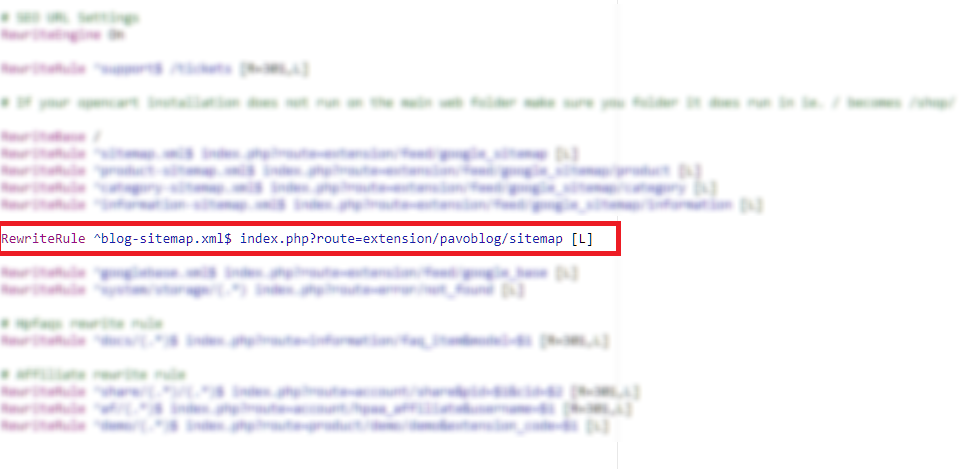
4. add this script -> RewriteRule ^blog-sitemap.xml$ index.php?route=extension/pavoblog/sitemap [L]
5. Click Save Changes in the upper right-hand corner when done.
6. Test your website with this url {your_website}/blog-sitemap.xml to make sure your changes were successfully saved. If not, correct the error or revert to the previous version until your URL sitemap works again.