HP Delivery Partners is an OpenCart extension to add delivery partners feature in your system.
Pre Install
- Please follow pre install section here if you haven't proceed one before: https://hpwebdesign.io/pre-install
- After completing the above steps, you can proceed with the installation as follows:
NB: You can disable base theme modification after installation.
Installation
1. After purchasing Module Hp Delivery Partners, Download and extract it.
You will get a file with the name XXXX.ocmod.zip format.
2. Navigate to the Extension → Extension Installer, then upload the file with the name XXXX.ocmod.zip earlier.
NOTE
On OC 2.x
Make sure the upload process until there is a success message: Success: The extension has been installed!
If an error message appears: … is using the same ID code as the one you are trying to upload!
It means you have uploaded the same file before. So you don't have to re-upload it.For the Update Process:
there will be a file override of the old file. Click the Continue button to continue the upload process.
3. Access the menu Extensions → Modifications. Then click the Refresh button at the top right, as shown in the following image.

Refresh Mods – Hp Delivery Partners OpenCart
4. Access the modules page.
Extension → Module / Extension → Extension
Filter for Module (OC →= 2.3.0.x above ).
Click Install and Edit Hp Delivery Partners.
At this point you will see the Hp Delivery Partners settings page.
The same page can be accessed via the Admin Menu (HP Web Design → Hp Delivery Partners).
5. Domain Validation
Every purchase of the premium opencart extension on HP Web Design will be validated for a license when you want to use it on the website, this validation is carried out in connection with the license per purchase limit. Articles about the validation process can be read at the link https://hpwebdesign.io/how-to-get-license-key
6. General tab
- Status : To activate the module.
- Color Scheme : The base color used for the module, is now used for the login and register page color themes
- Term & Condition : information page used for terms & conditions
- Delivered Order Status : Order status for orders that have been delivered
- Completed Order Status : Order status for orders that have been completed
- Available Countries : Country code available when user register

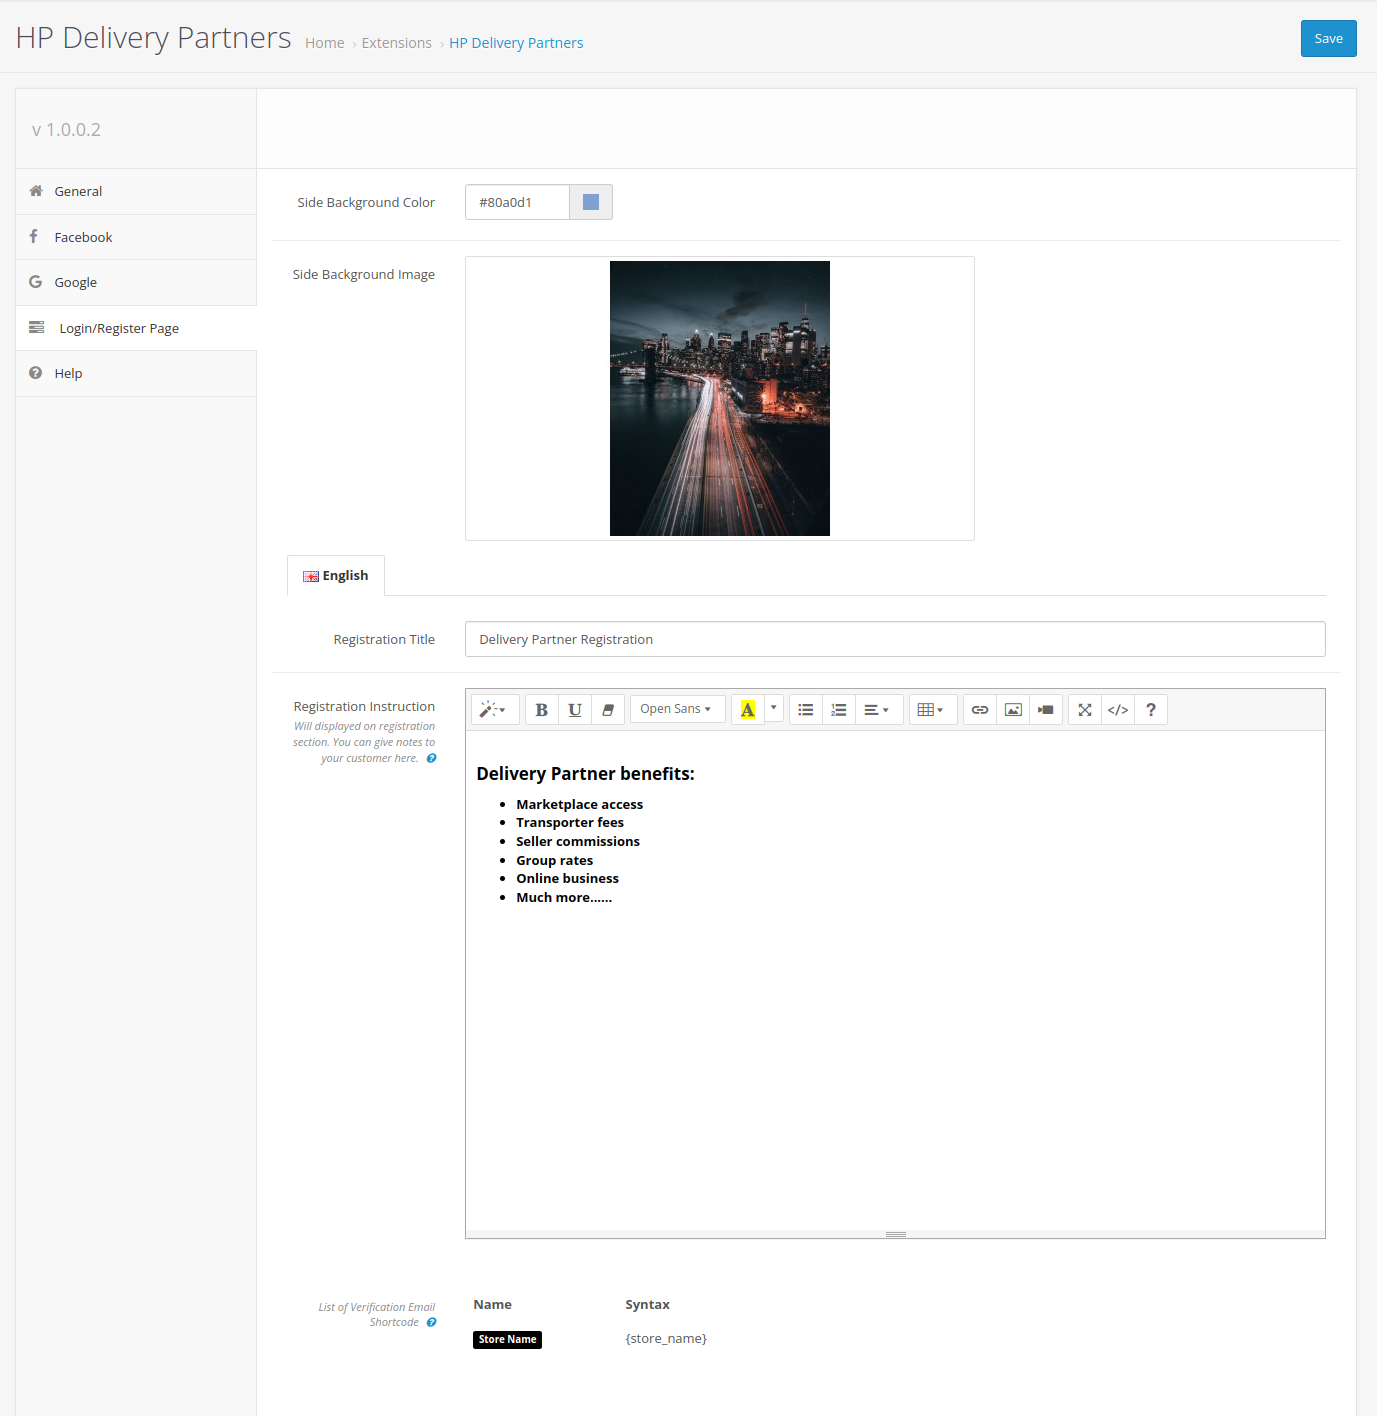
7. Login/Register Page Tab
- Side Background Color : Color used for sidebar on login and register page
- Side Background Image : Background image used for sidebar on login and register page
- Registration Title : Title text for registration form
- Registration Instruction : Instruction text displayed in the sidebar on the login and registration page
8. Facebook and Google Tabs
To activate the Facebook and Google login features, there are quite a lot of configurations done, please follow the explanation below.
Settings Login / Register Facebook
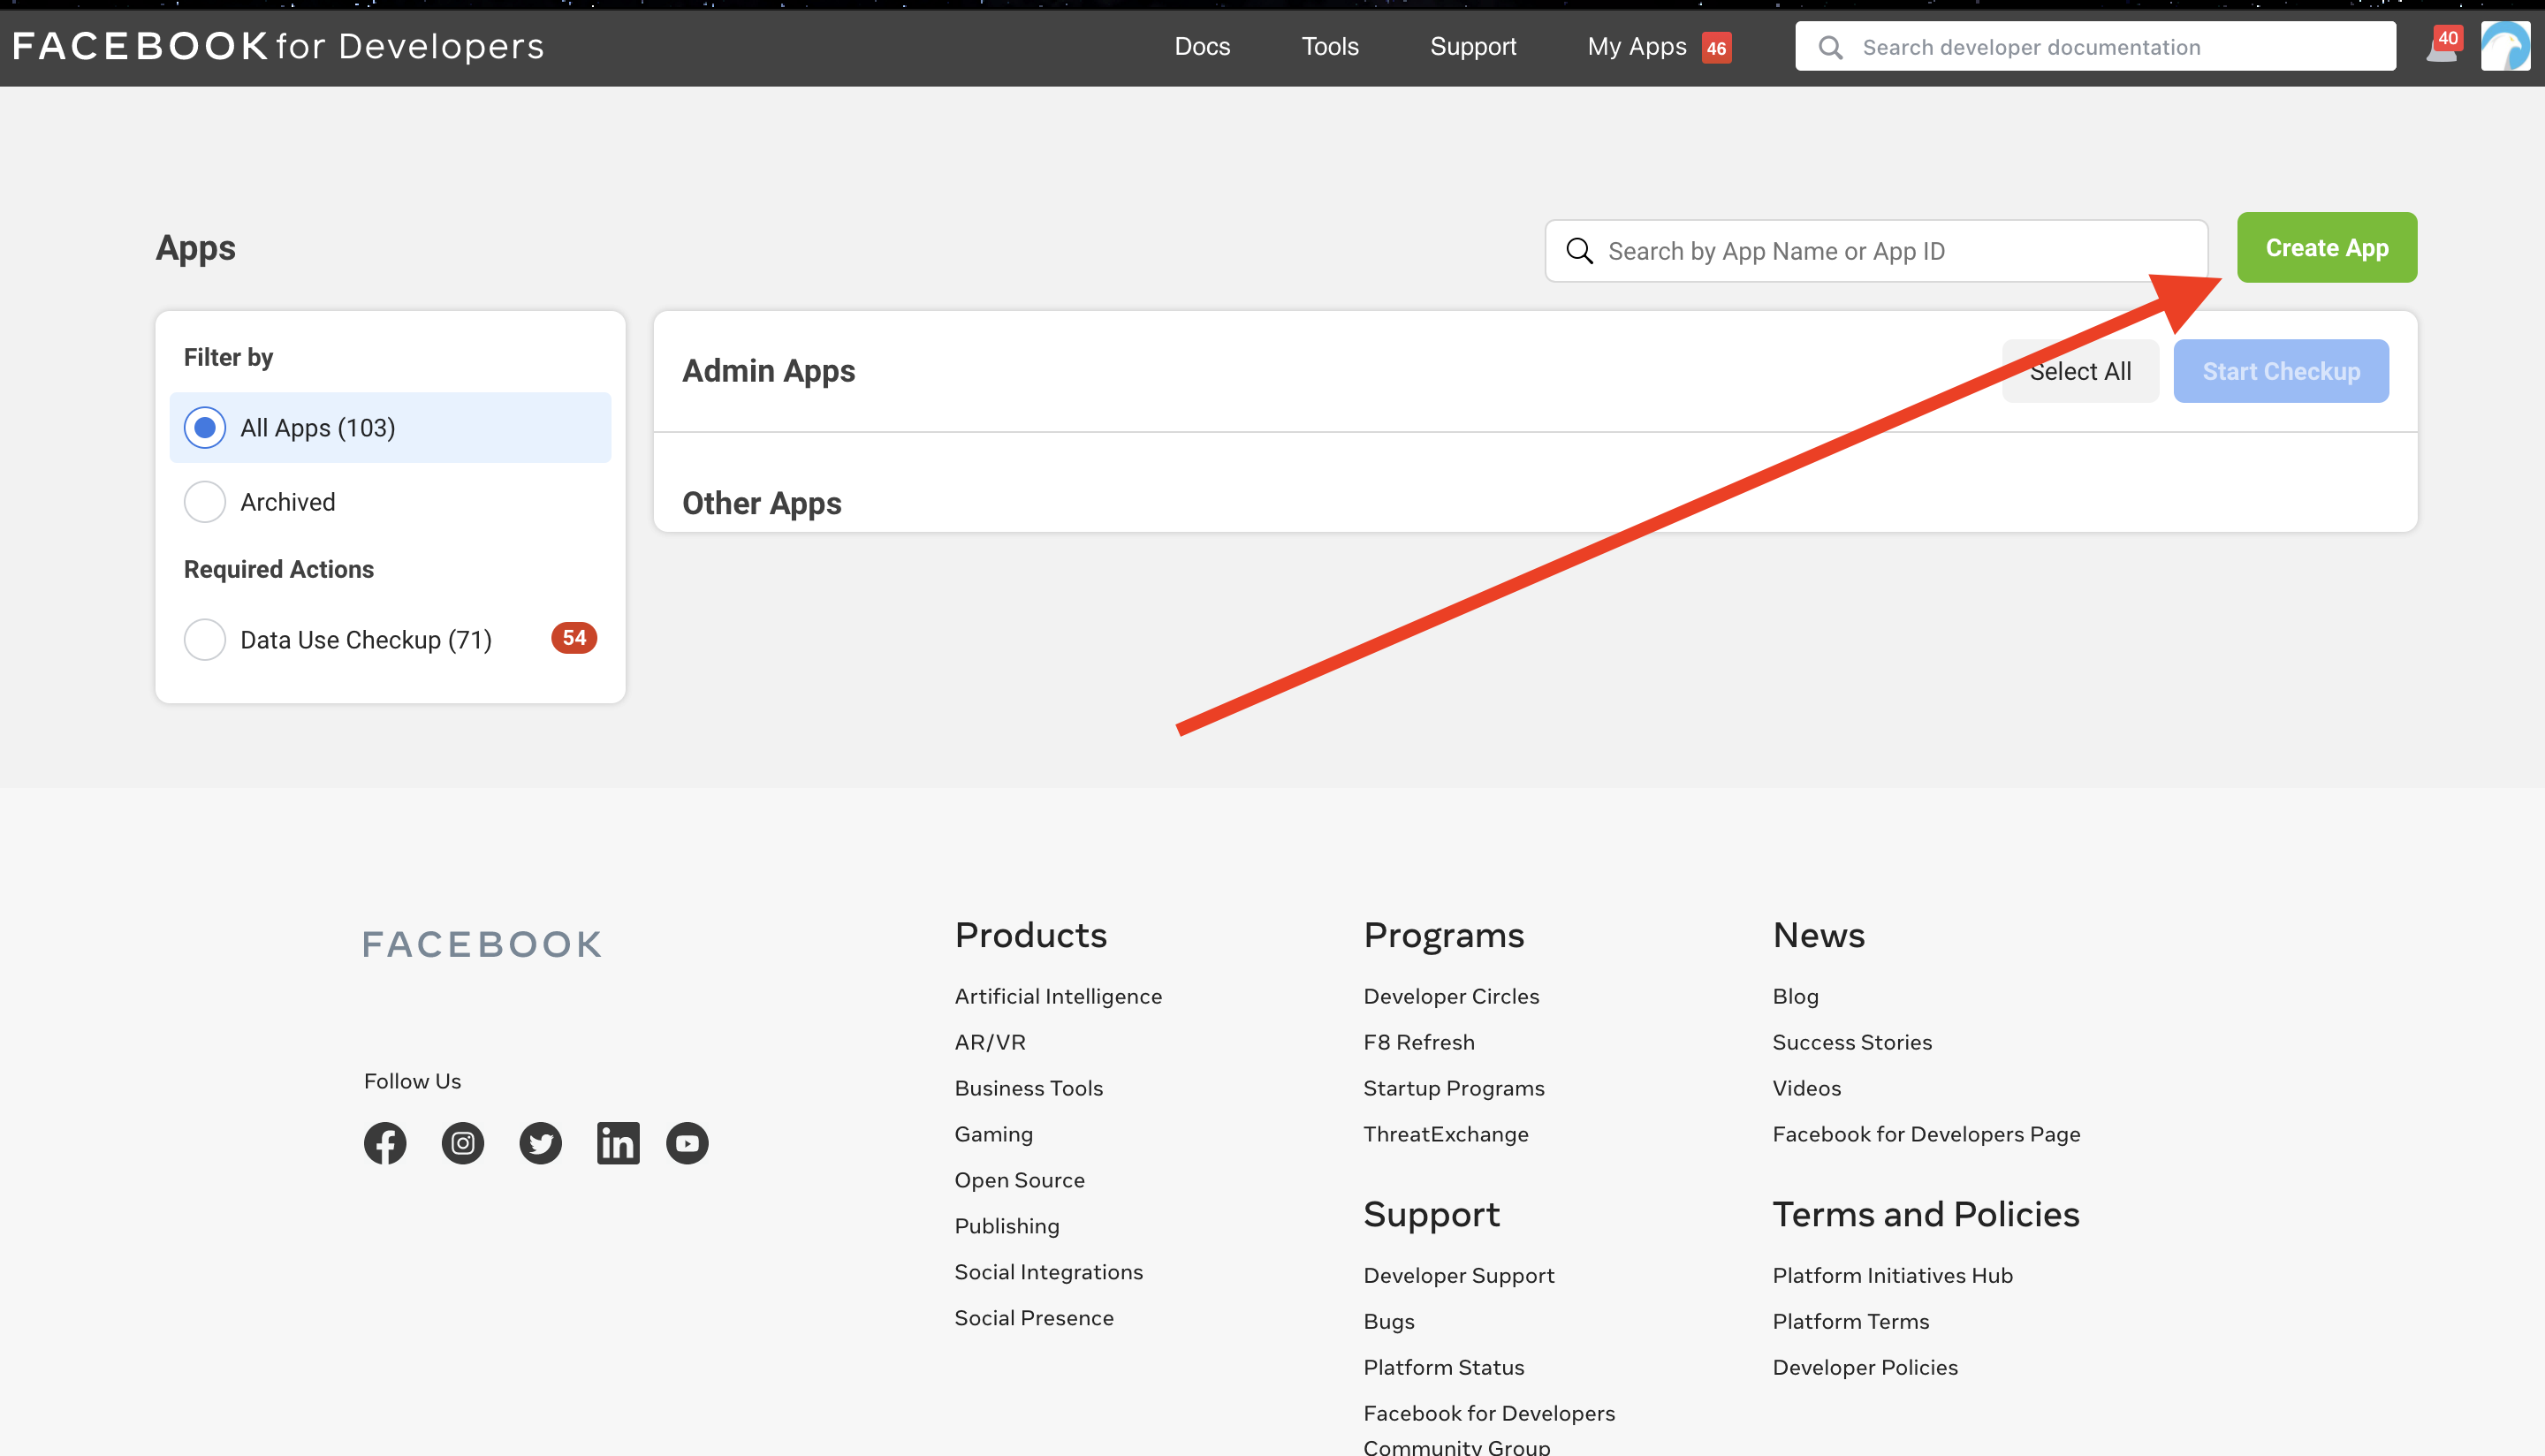
1. Go to the link https://developers.facebook.com/apps/
2. Click the button Create App
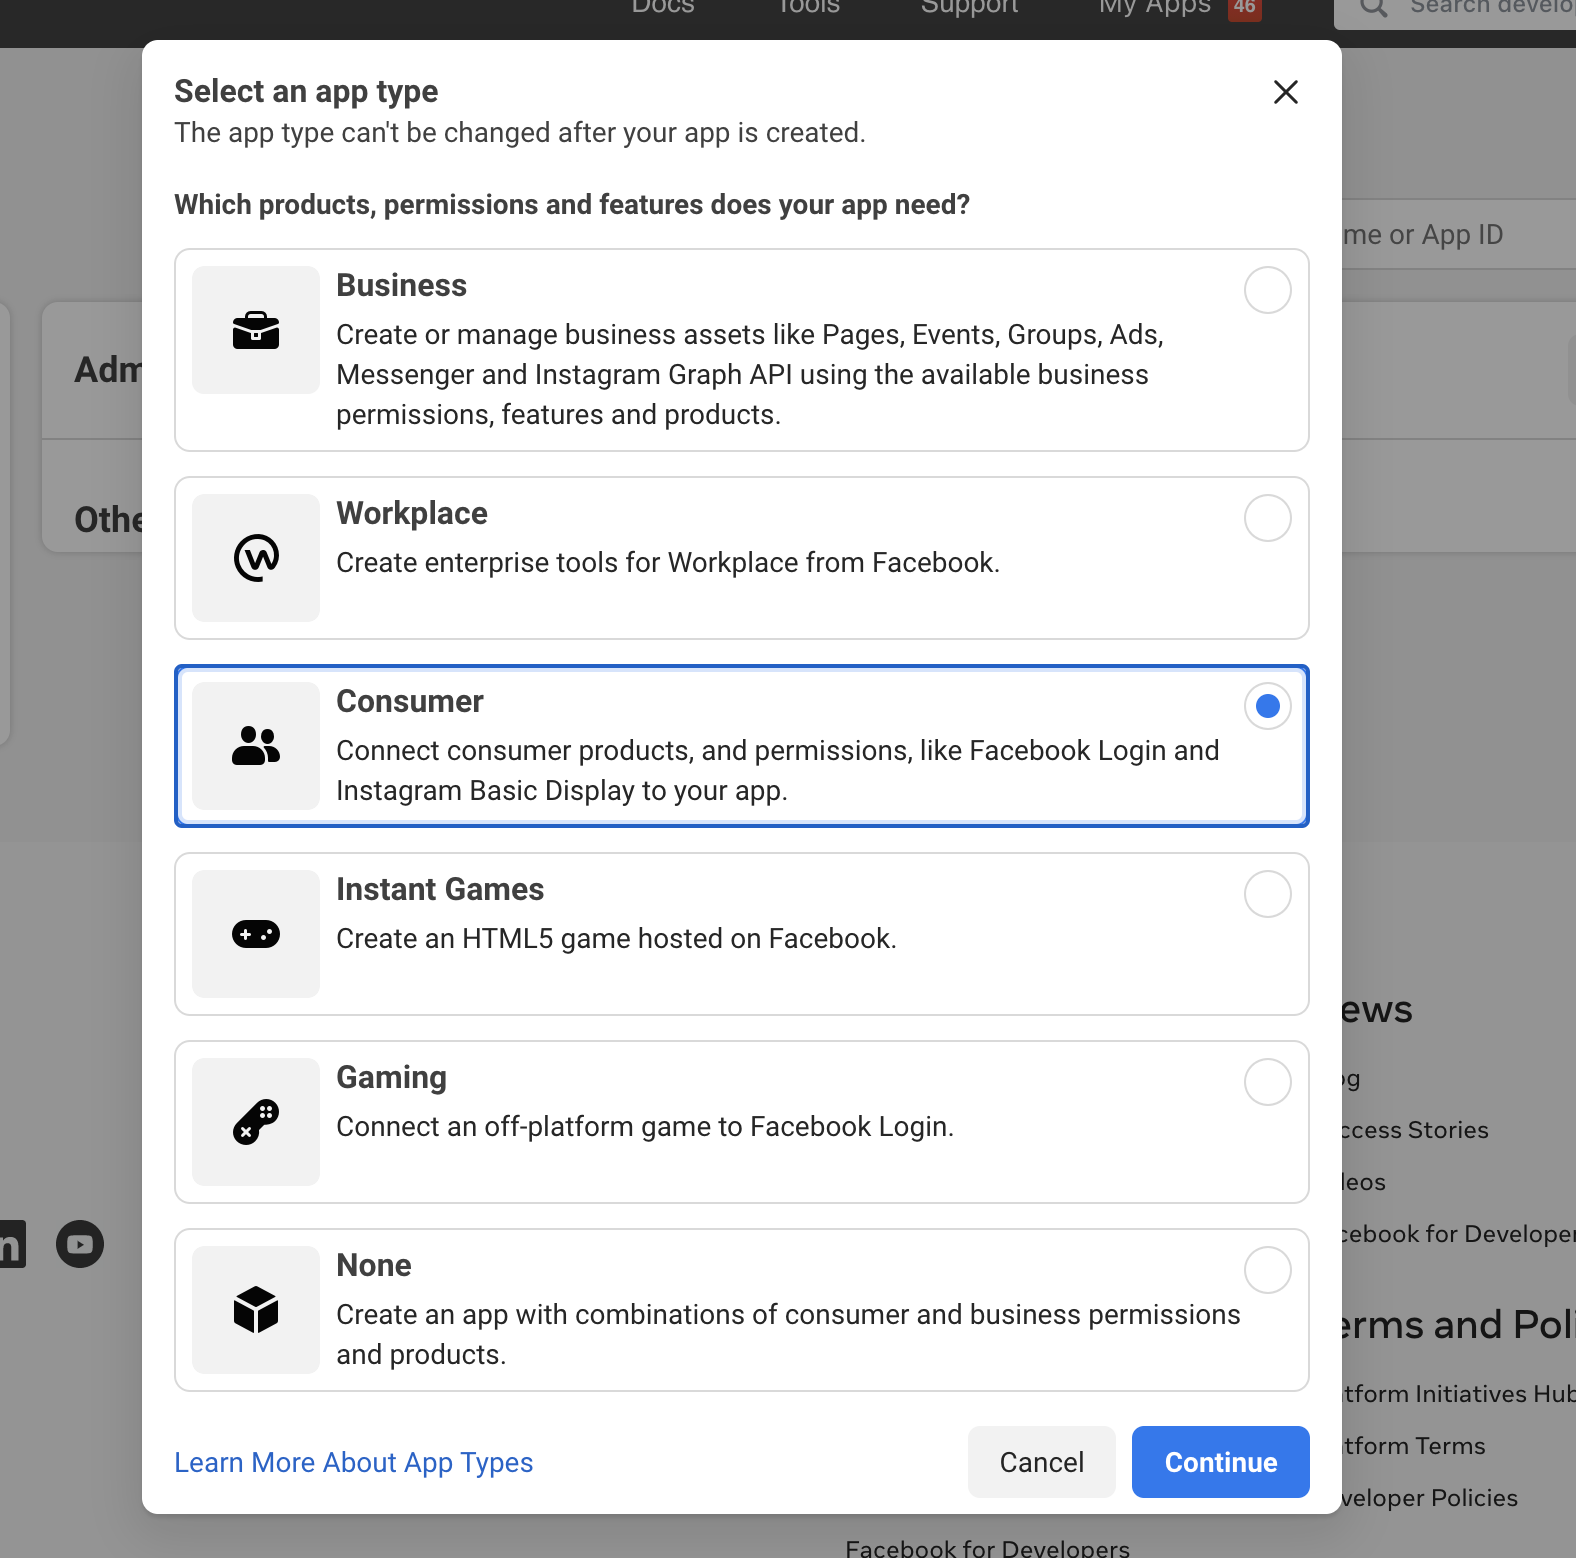
3. Select Consumer.
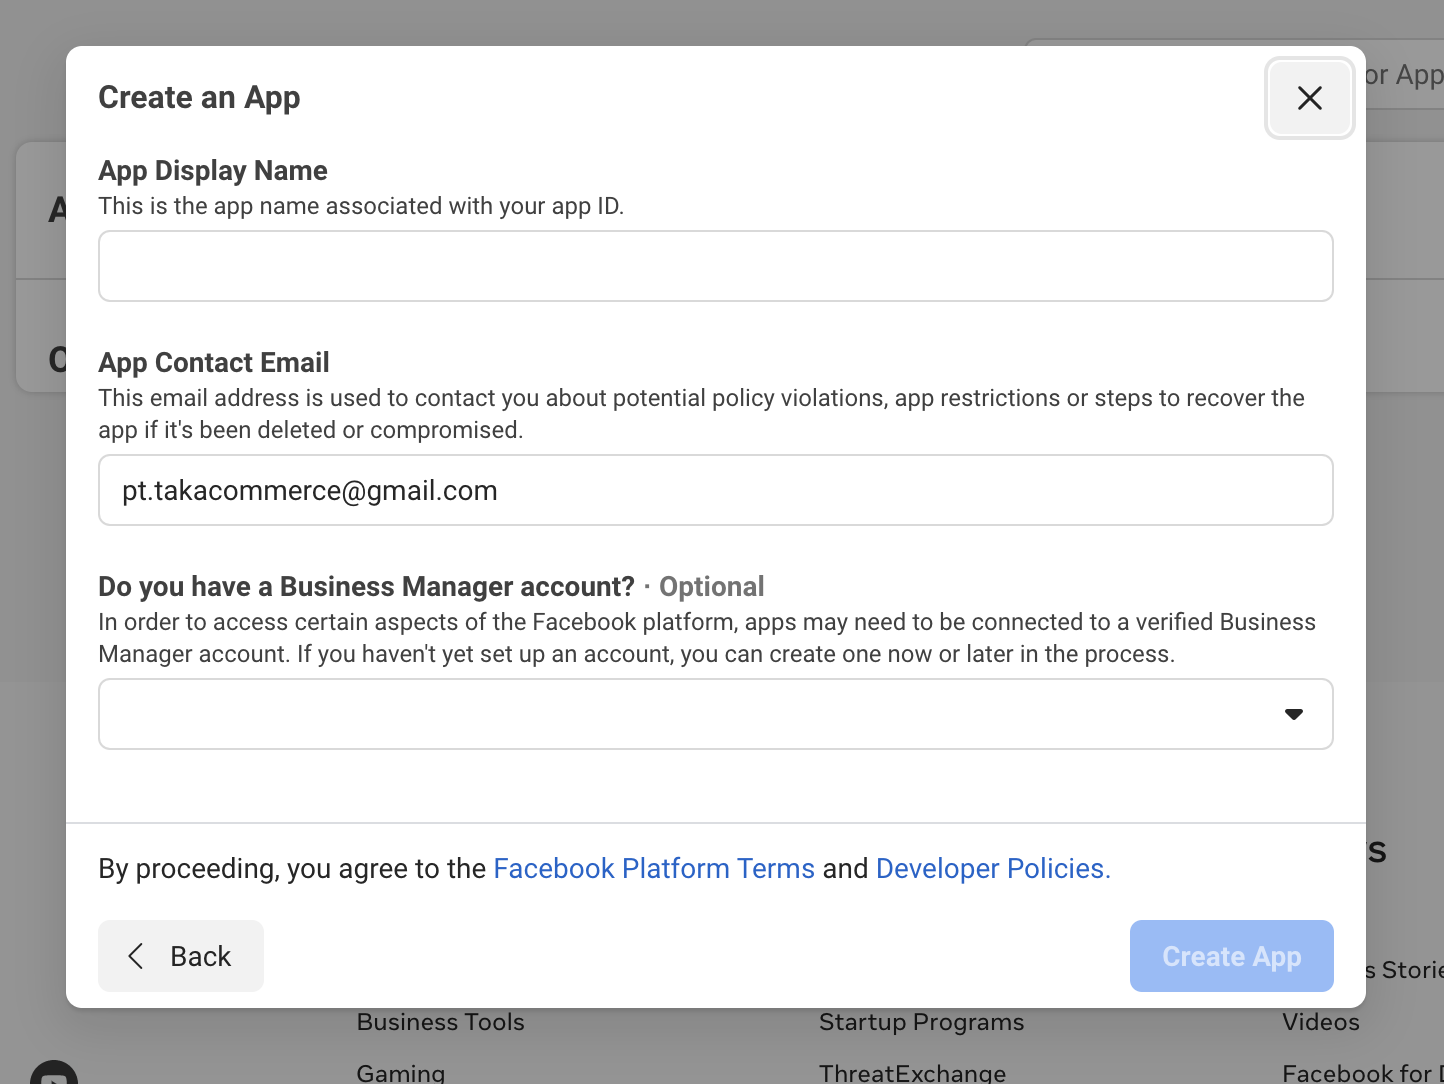
4. Fill Display Name with the name of the website you are using.
5. Click the Set Up button on Facebook Login.
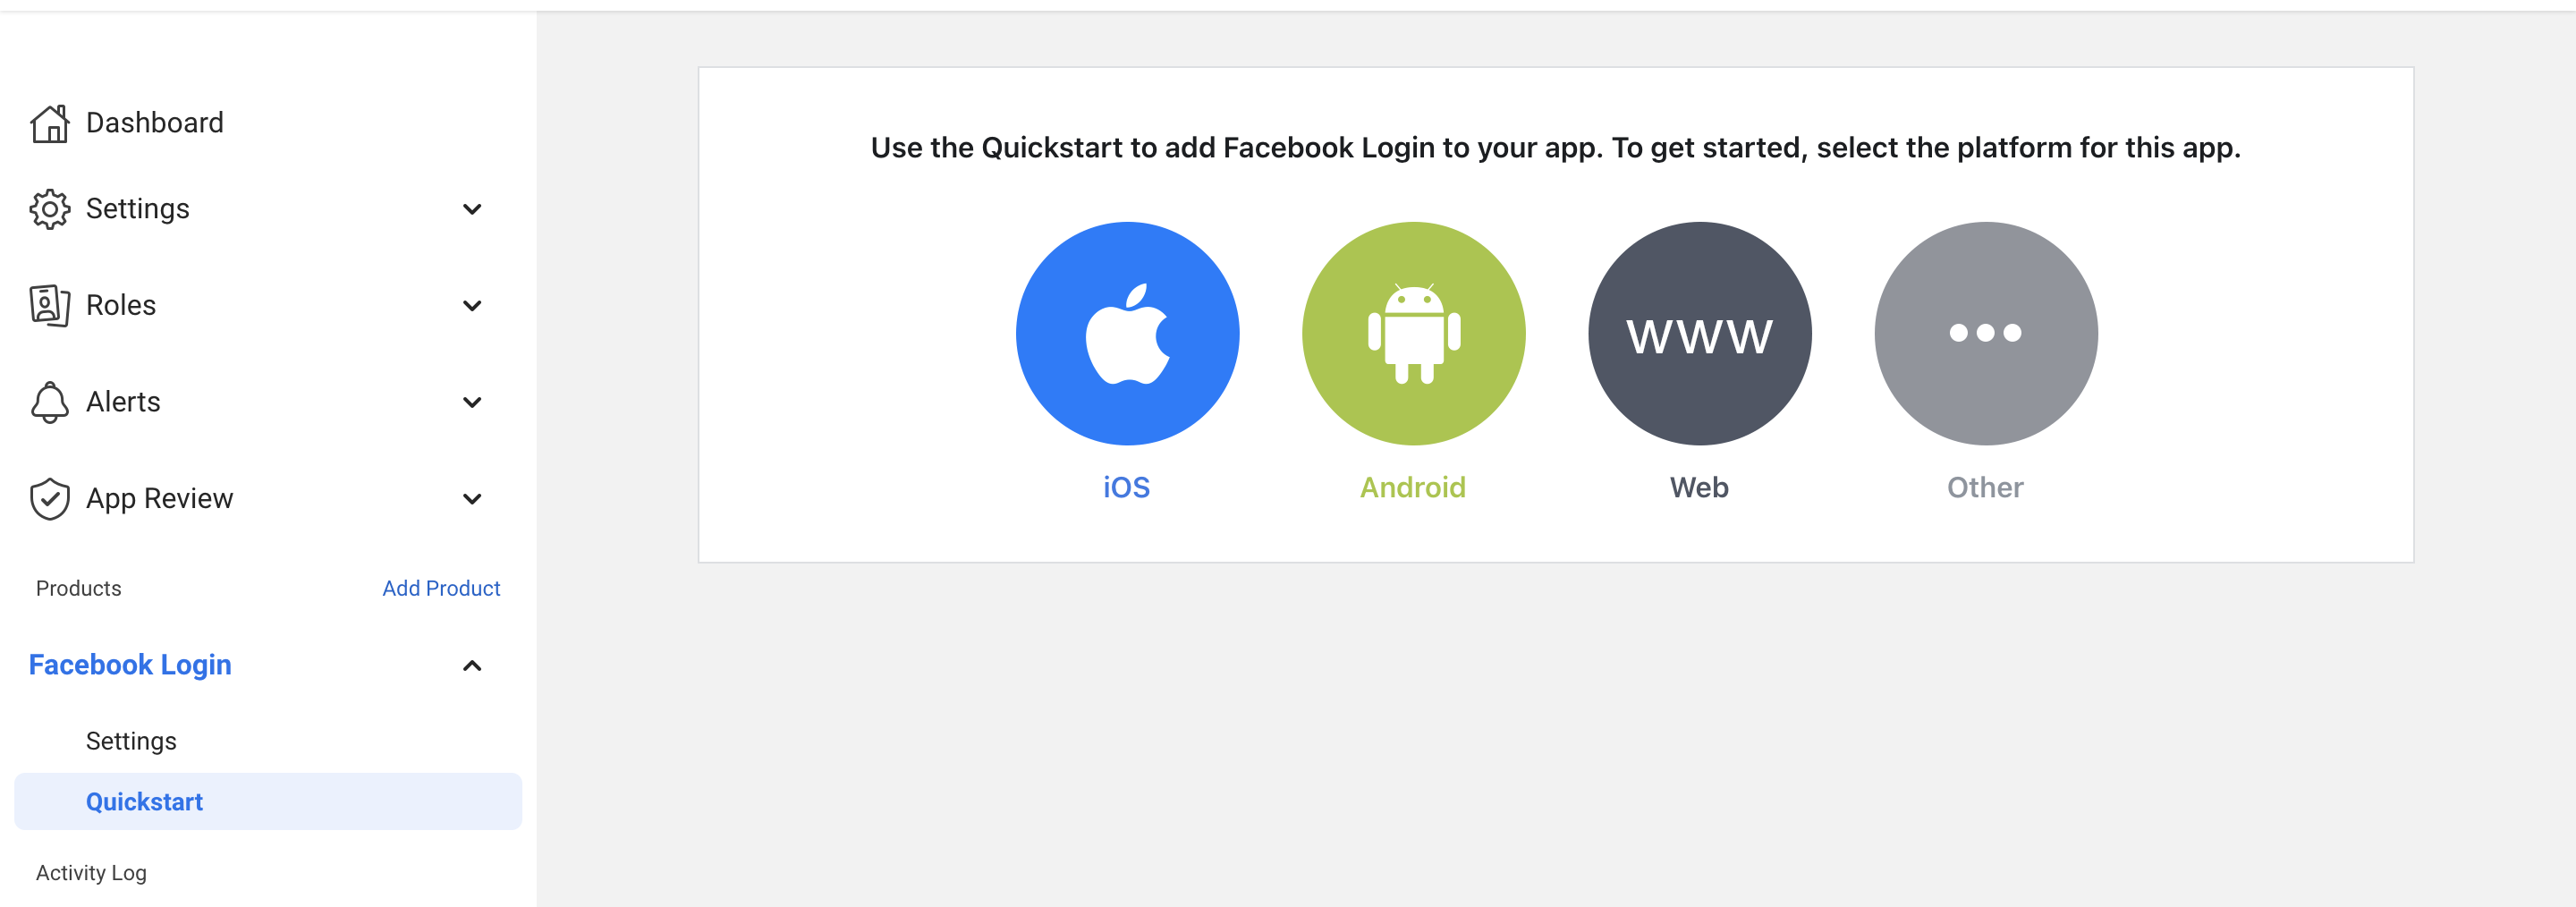
6. Select Platform Web and fill in your web URL.
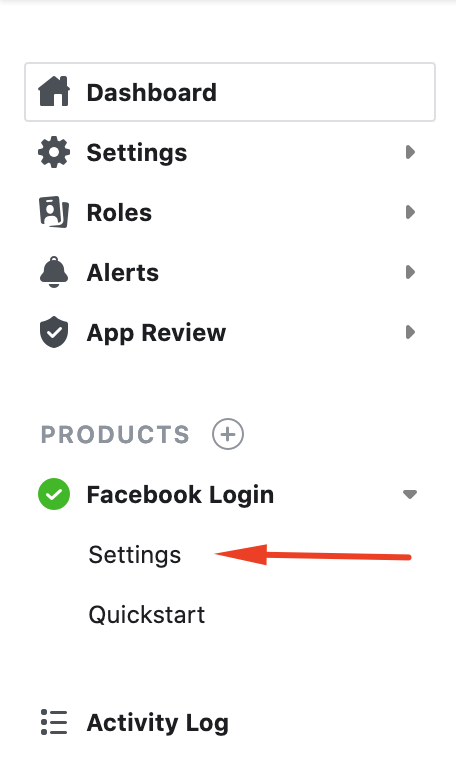
7. Go to the Settings page under Facebook Login.
8. Fill in the Form Valid OAuth Redirect URIs with :
https://{your domain}/index.php?route=delivery/hp_delivery_partner
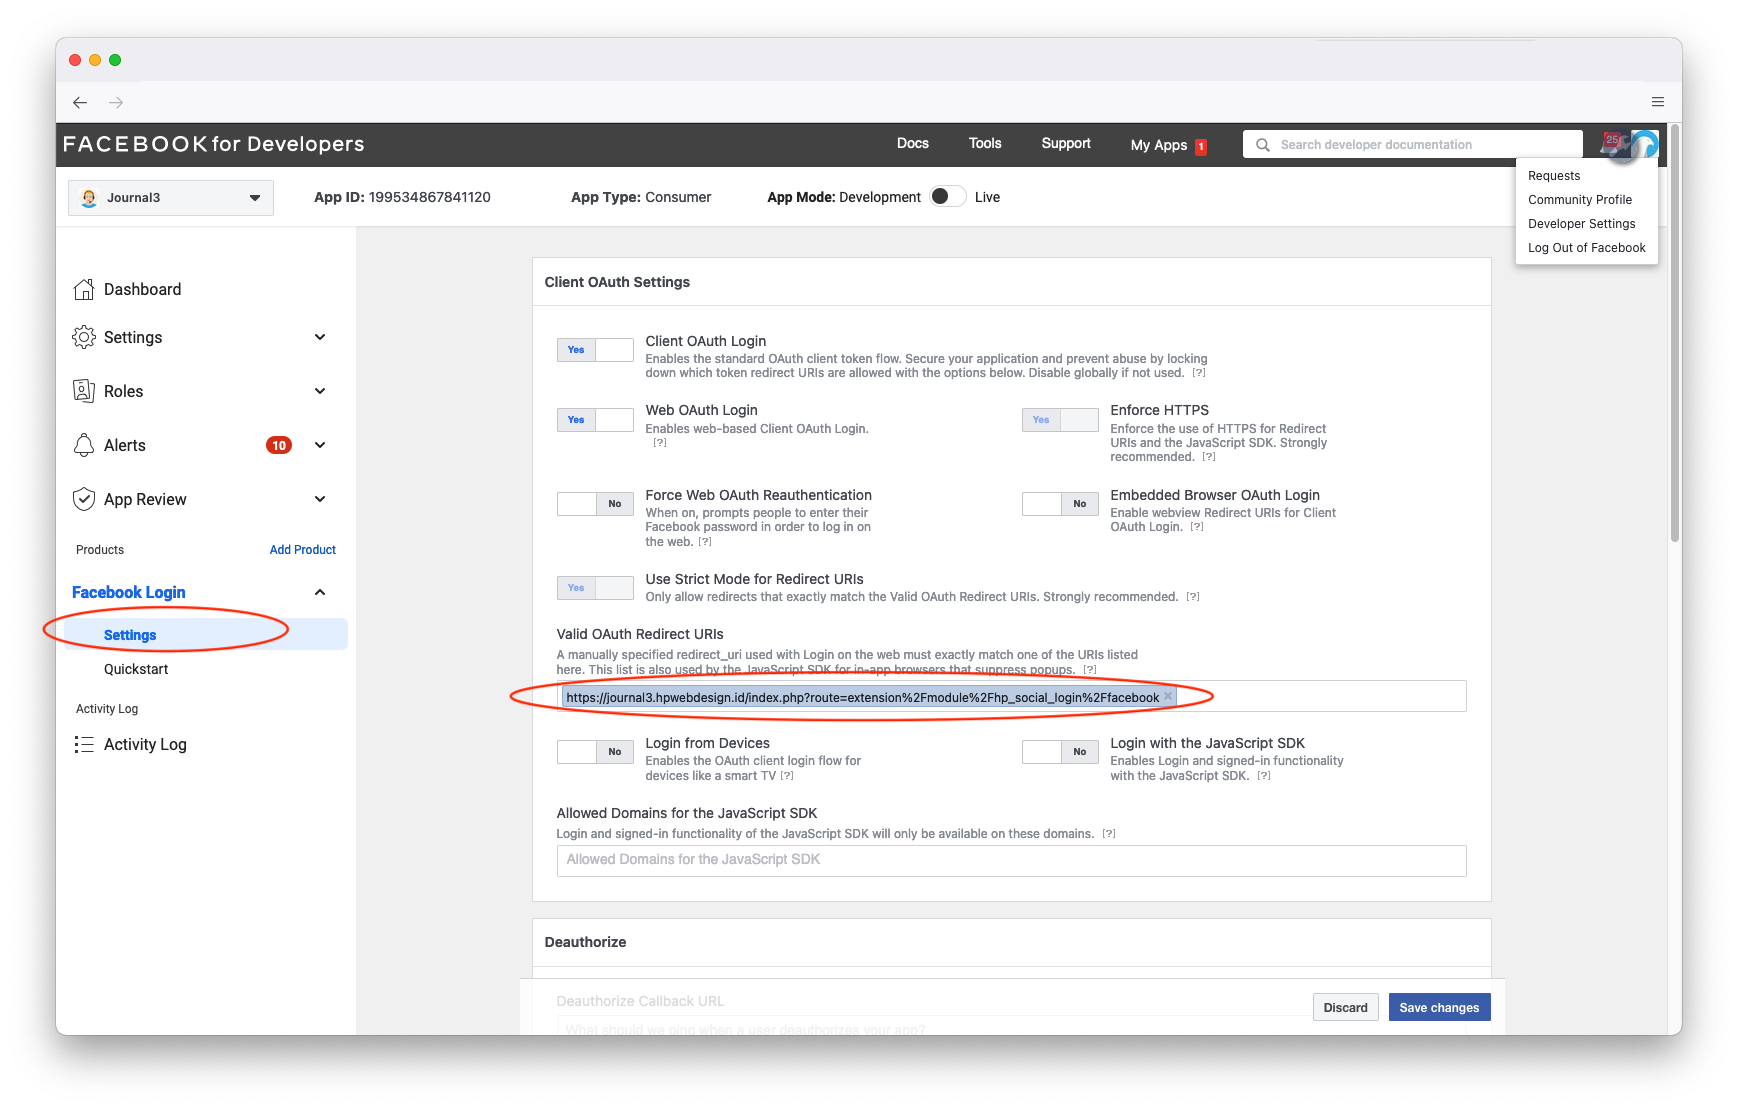
setting 0Auth redirect URI on hp delivery partners opencart
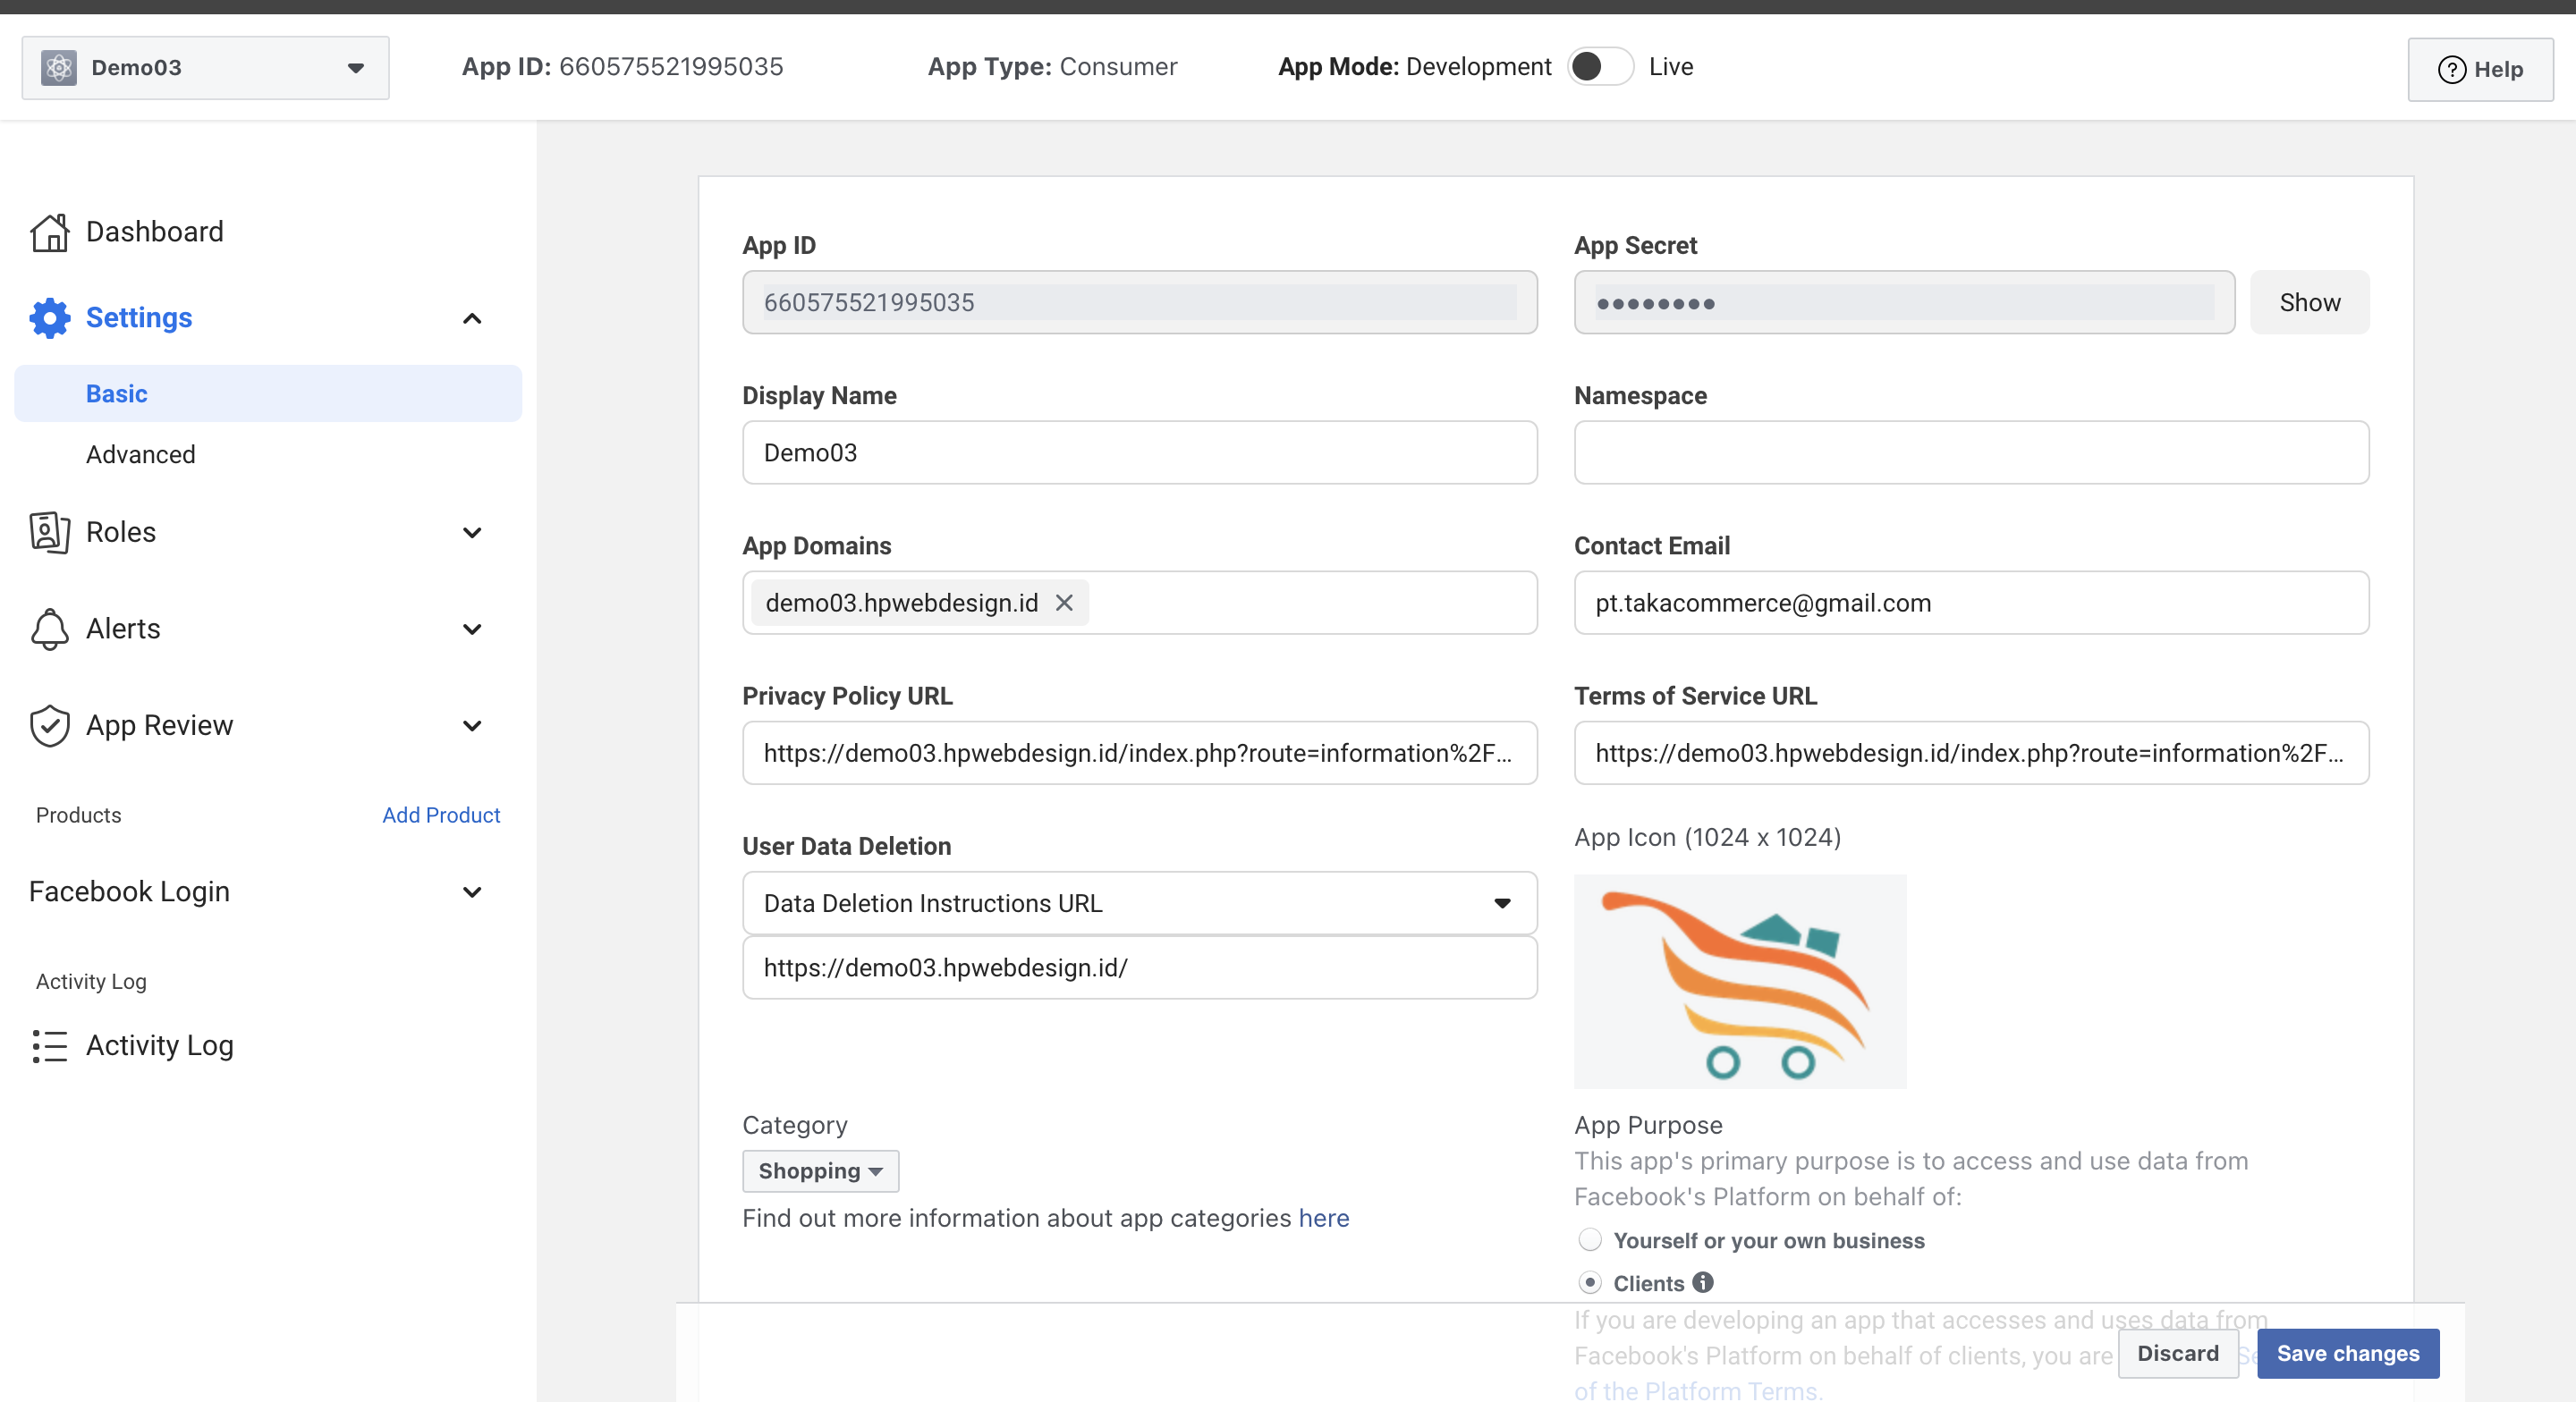
9. Open the Basic page via the Settings menu > Basic. Fill in everything according to your web information except Namespace (optional).
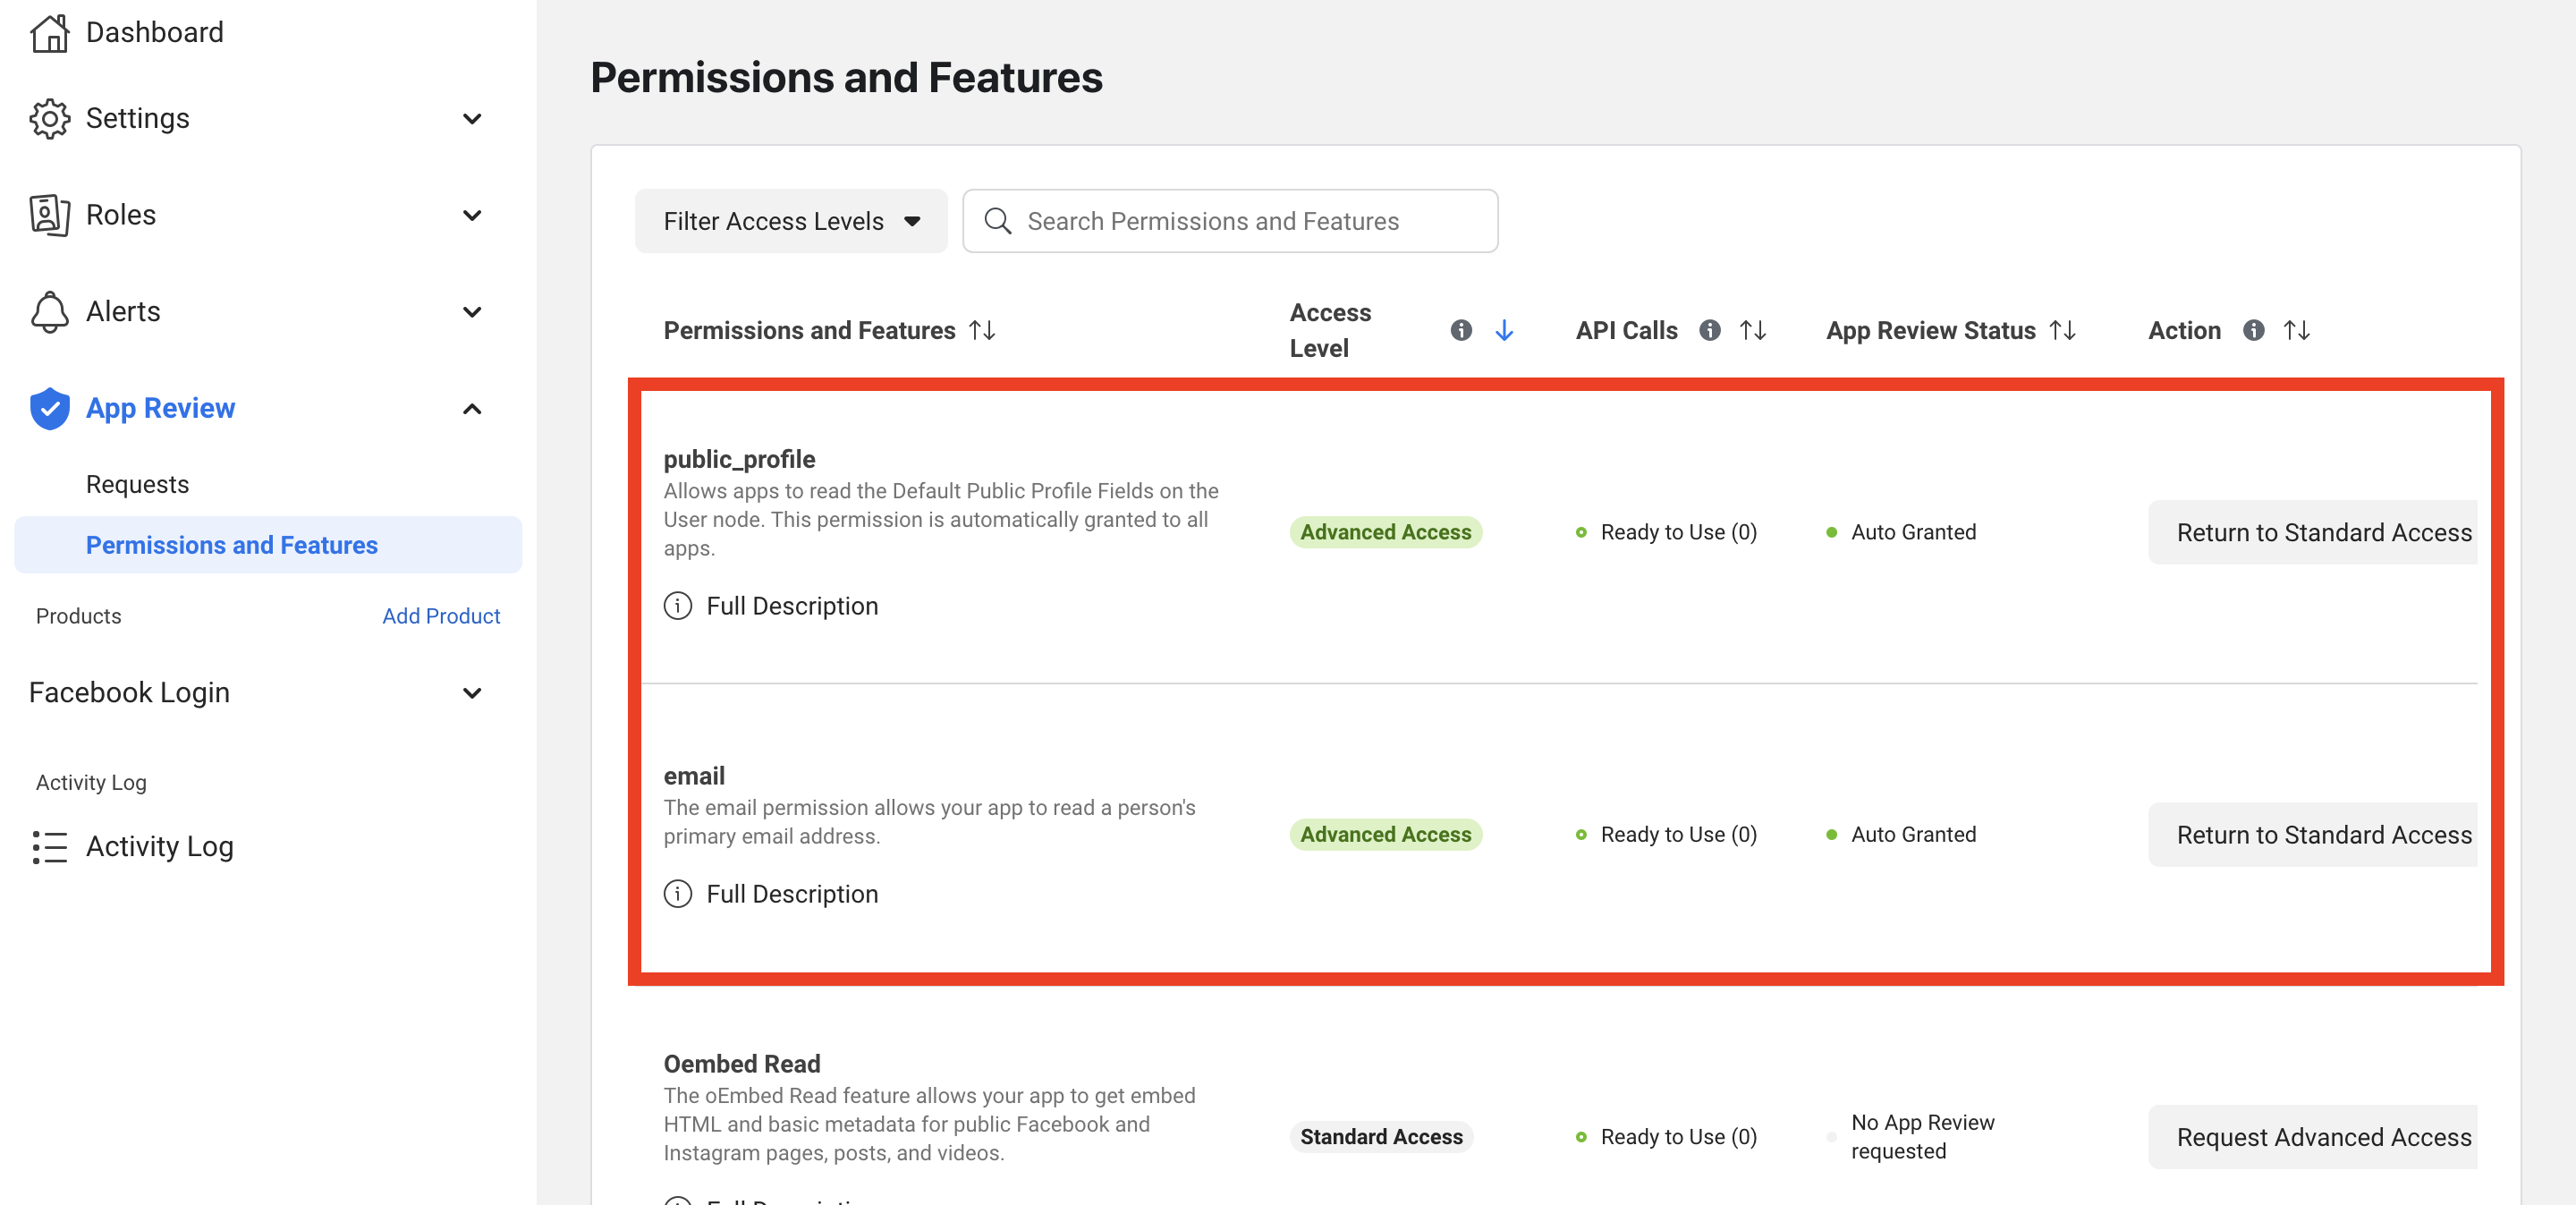
10. Go to the App Review page > Permissions and Features. Click Get Advanced Access for public_profile and email. If you have Get Advanced Access it will appear as below.
11. Make App Mode to Live.
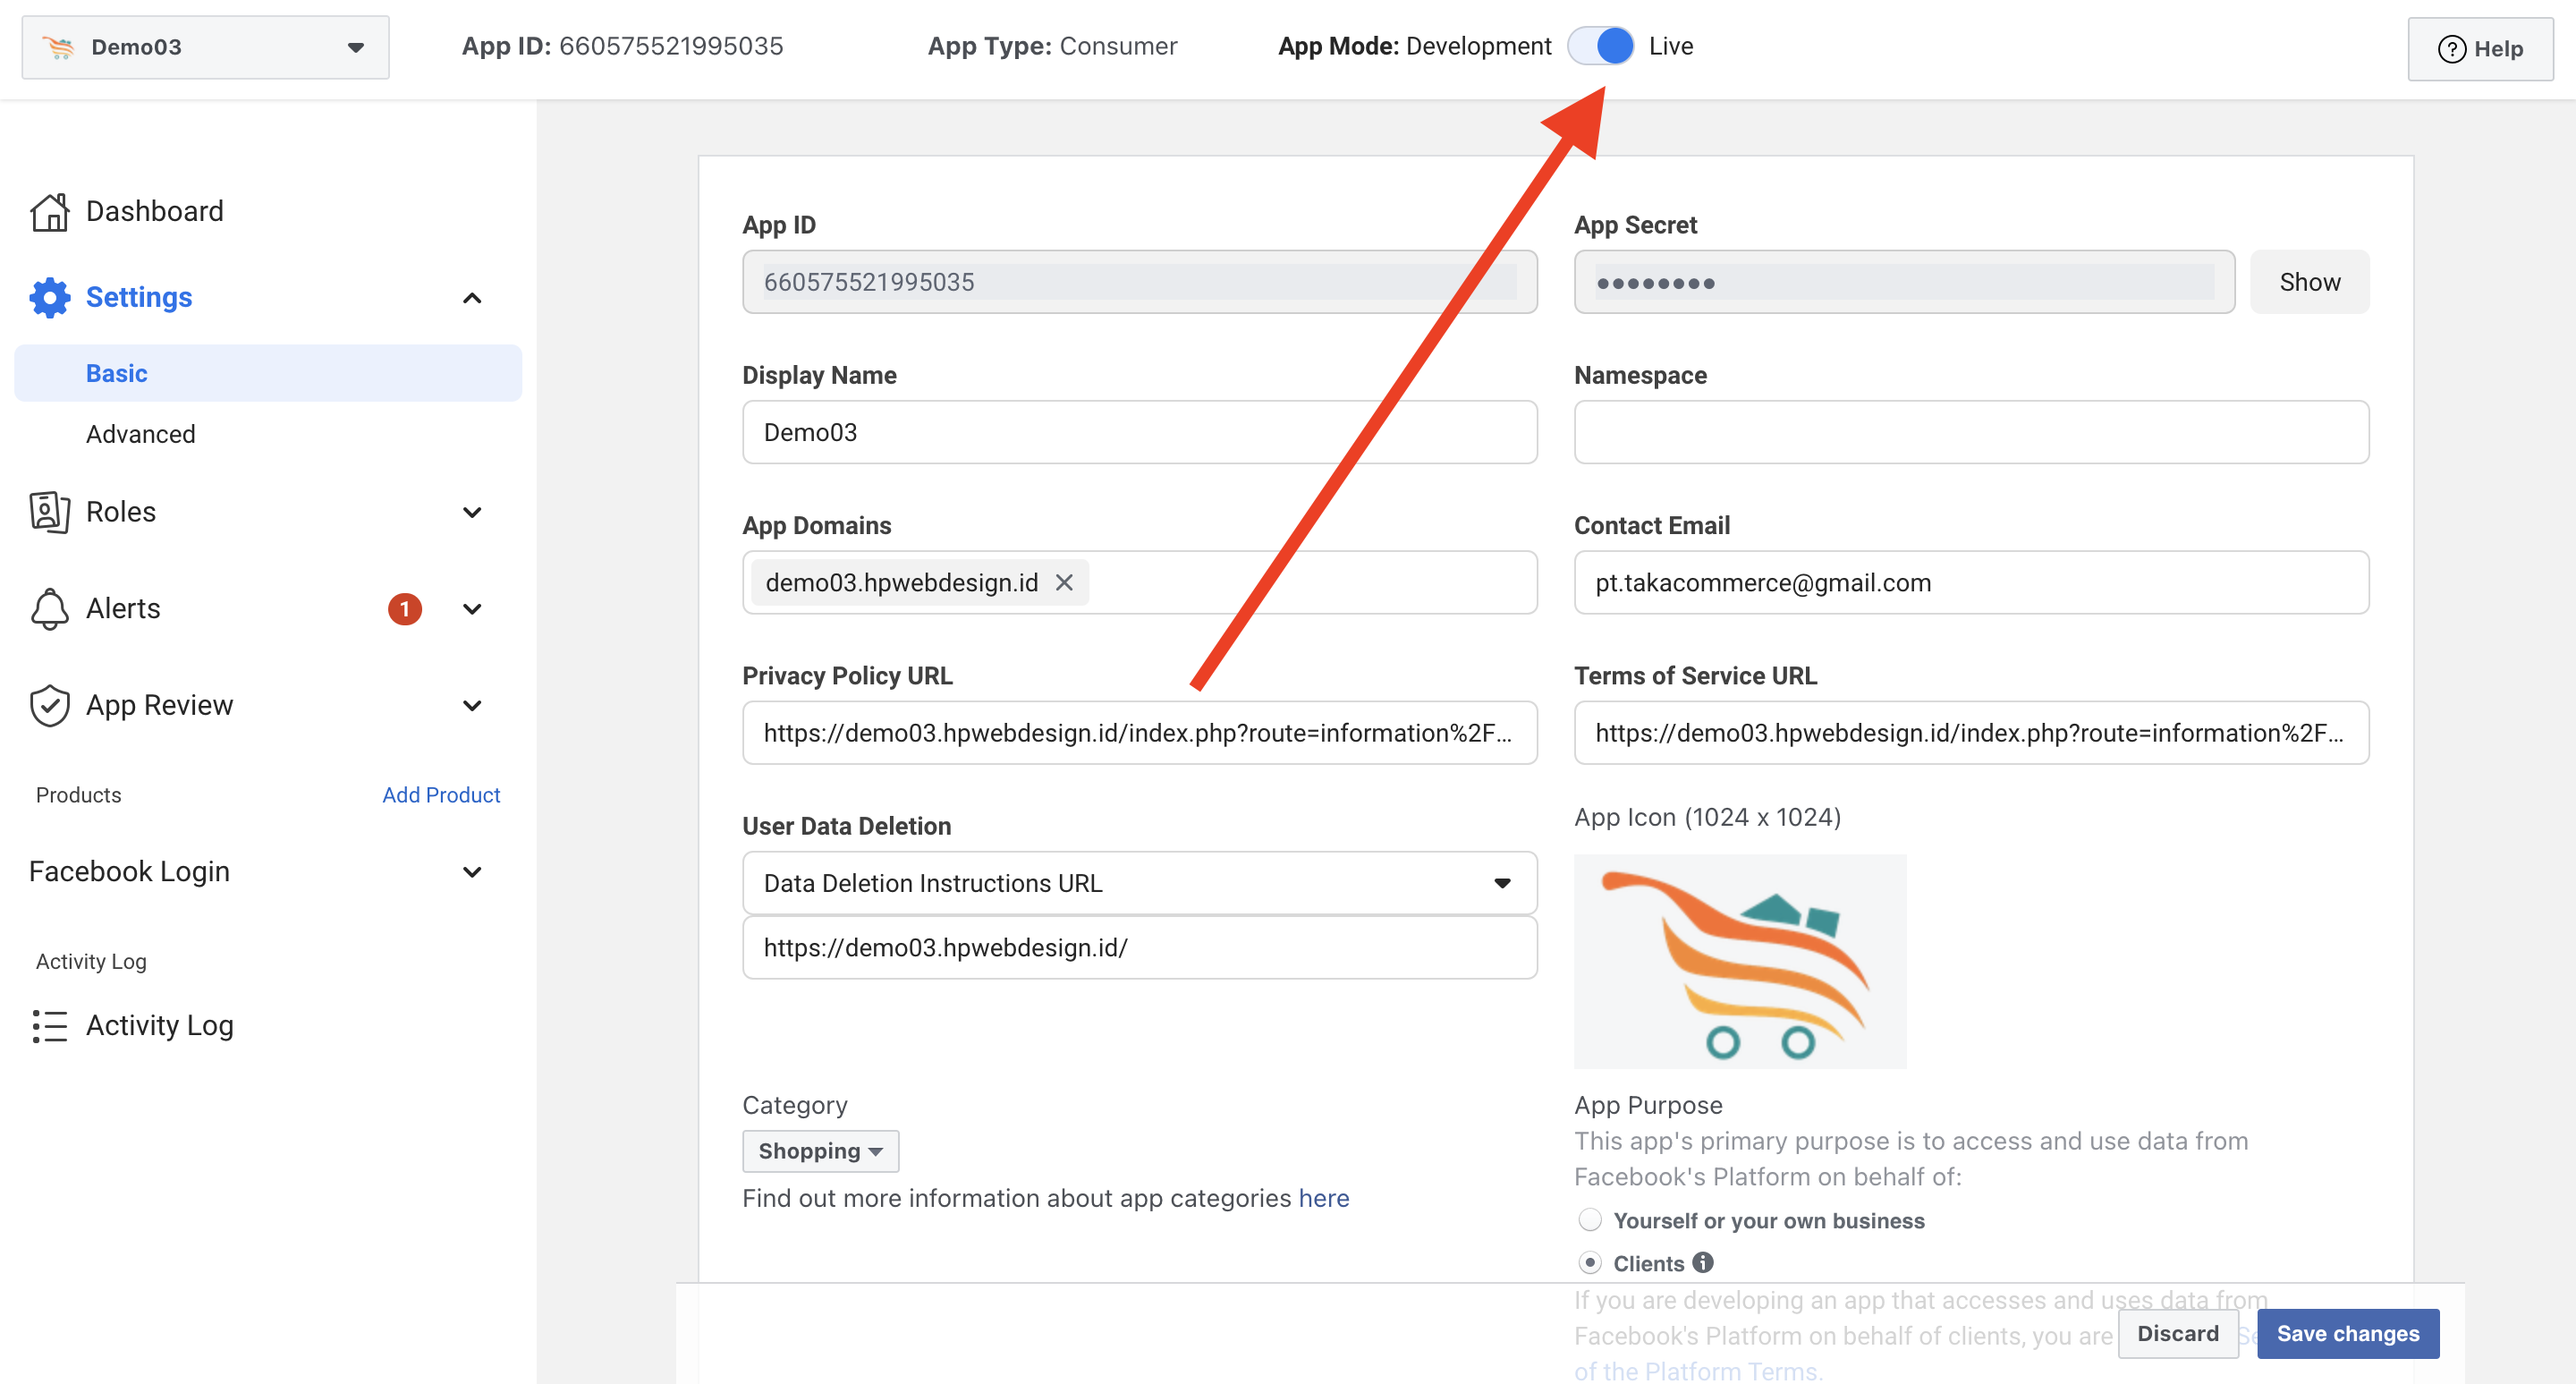
12. Copy App ID and App Secret, so you can see App Secret press Show.

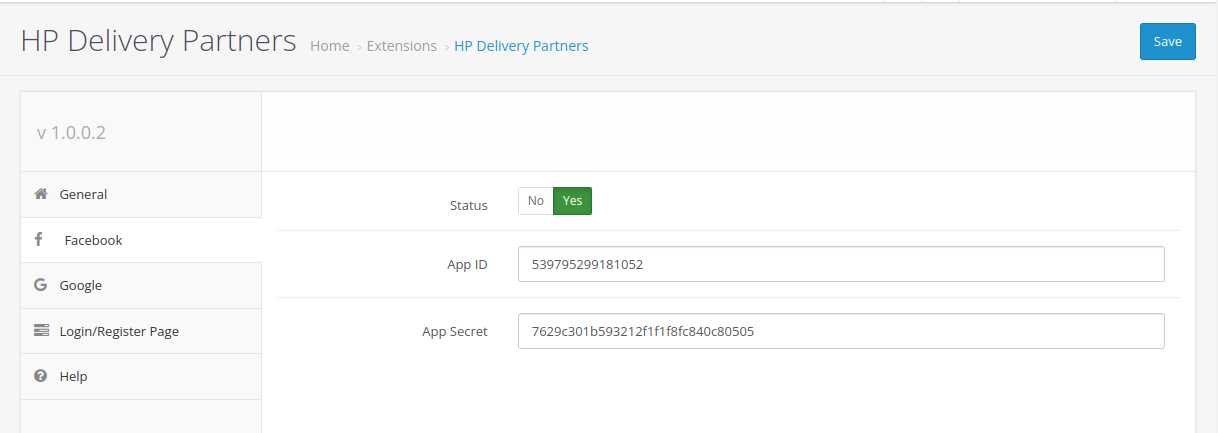
13. Return to the Hp Delivery Partners settings page and paste the App ID and App Secret that you copied earlier. Don't forget to set Status to On.
Settings Login / Register Google
1. Go to the link https://console.developers.google.com/apis/dashboard.
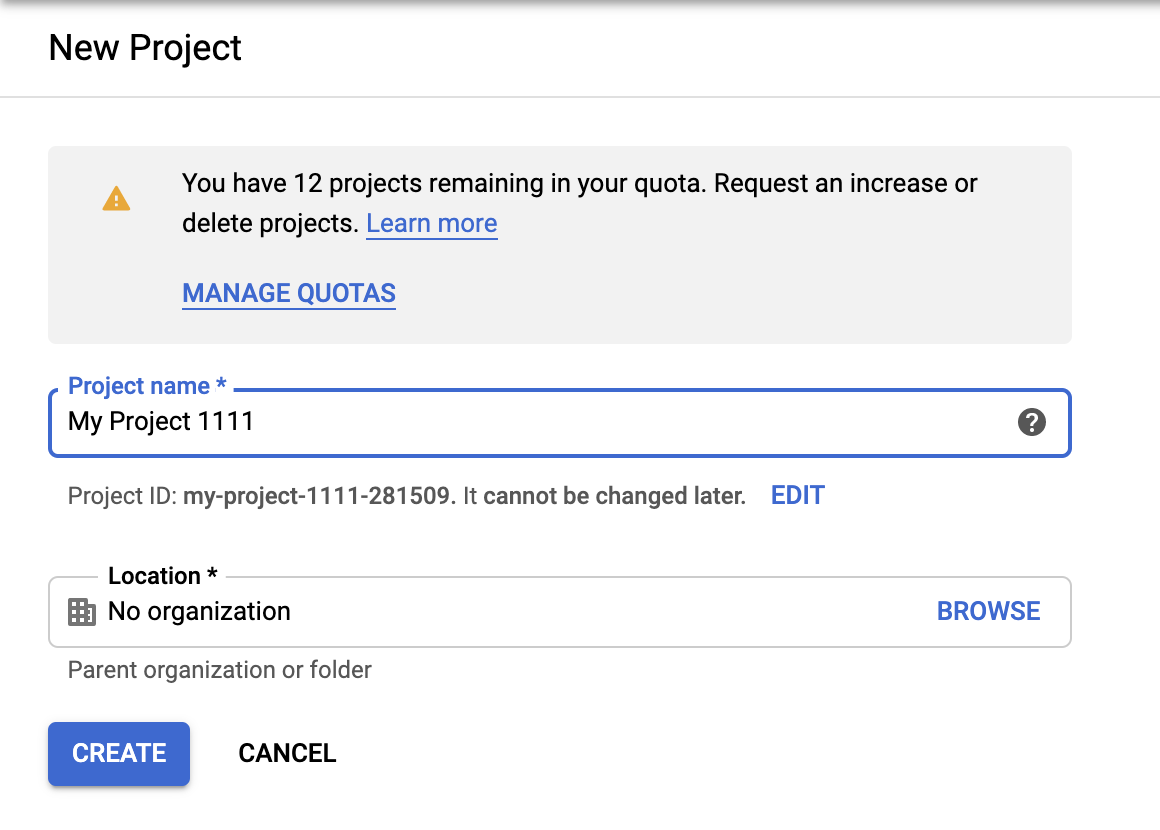
2. If you don't have Project yet, click Select Project.

3. Click New Project, then fill in the data. If you have clicked the Create button.
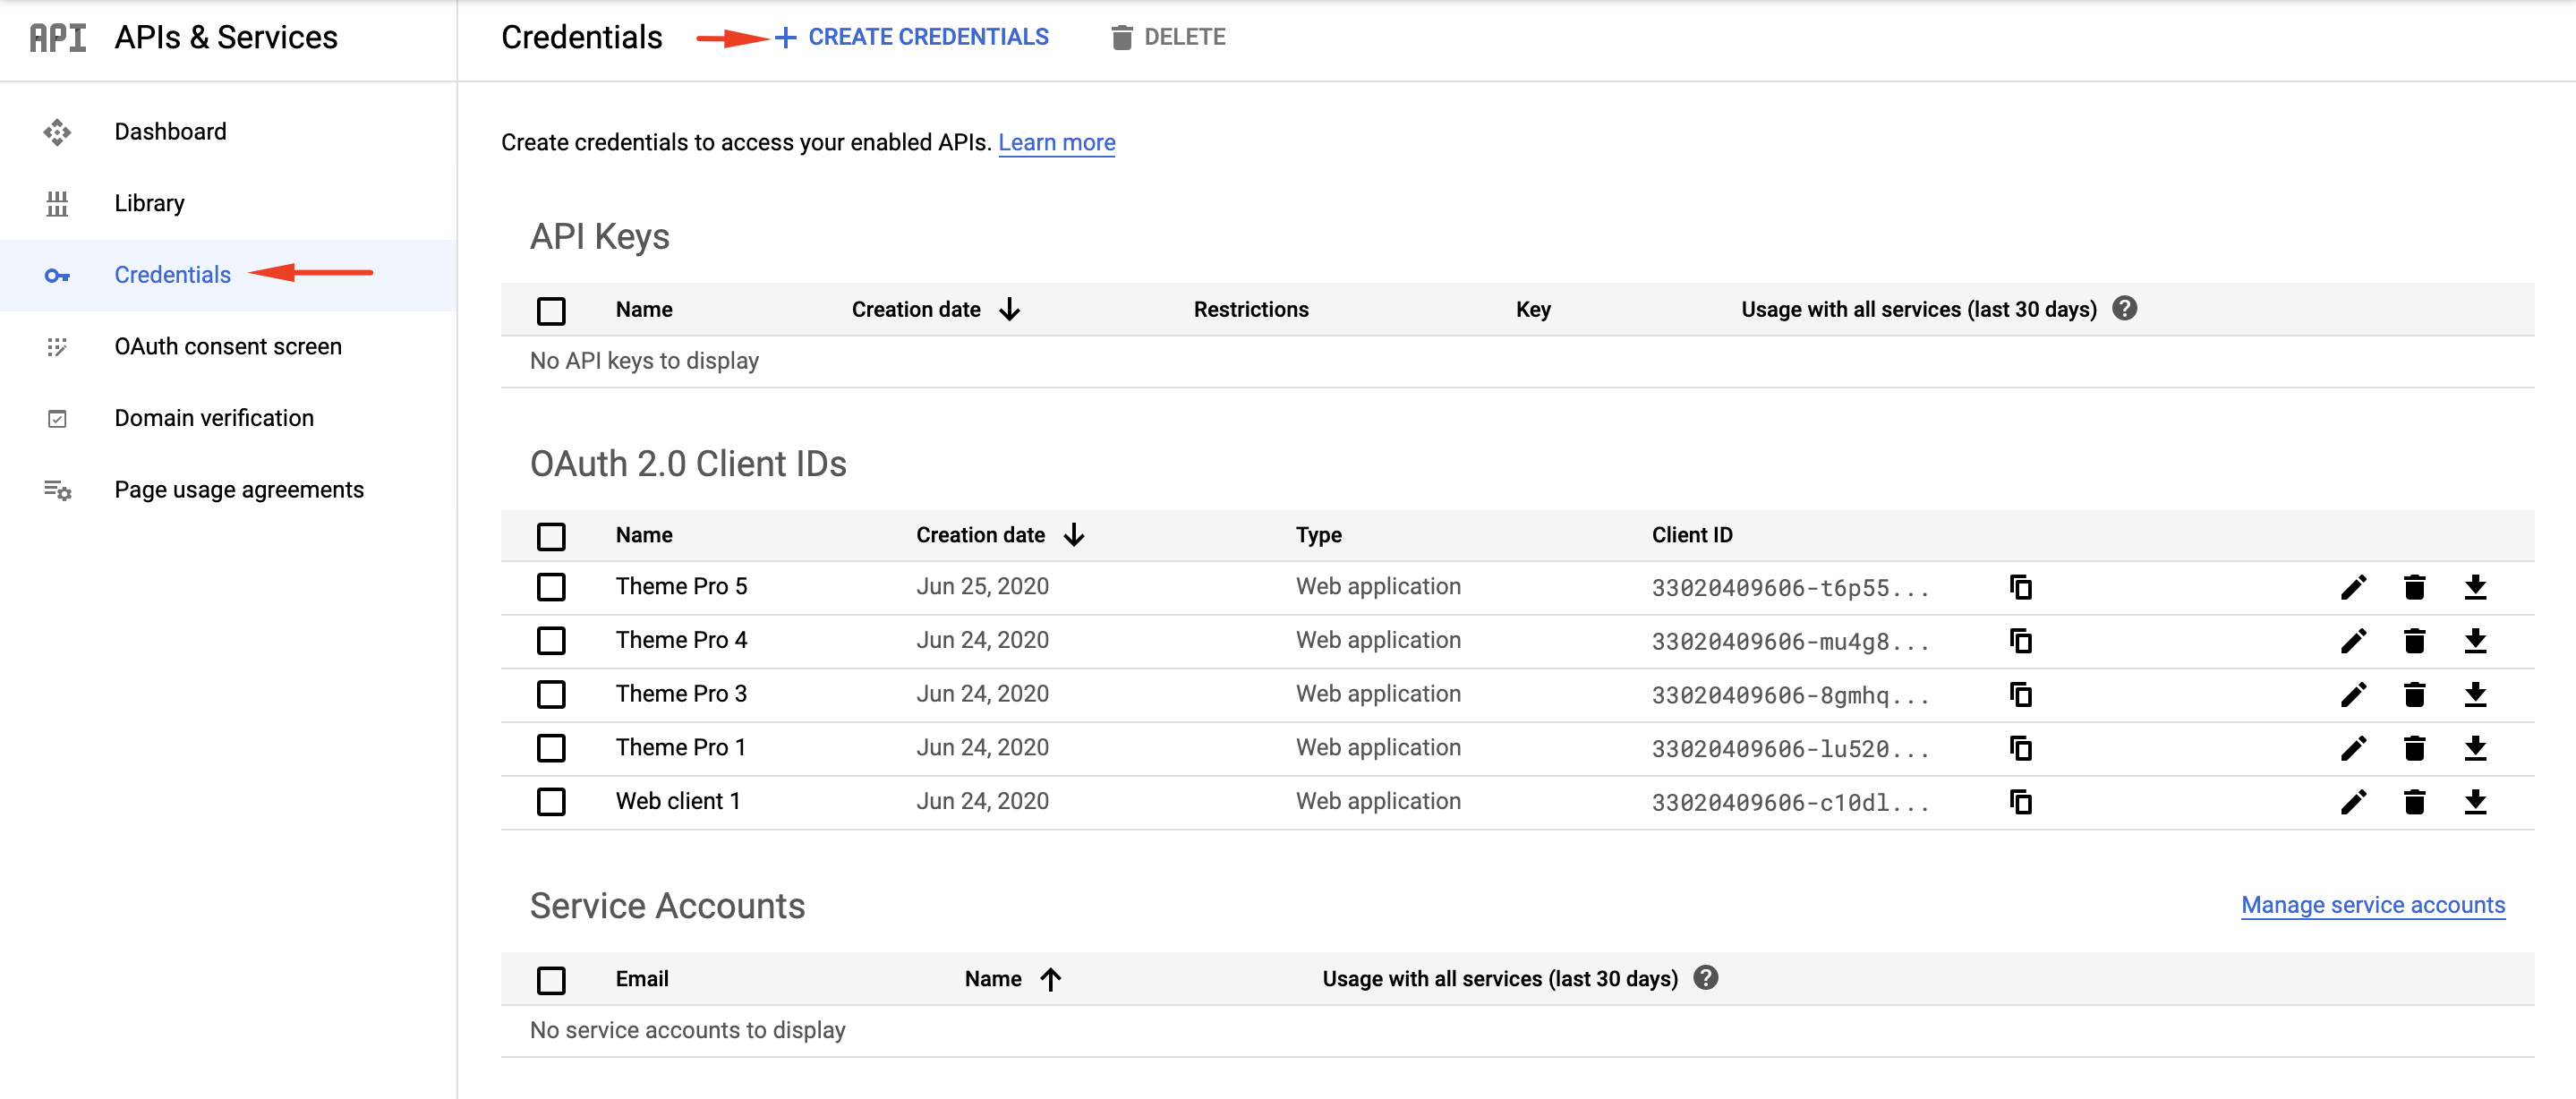
4. Go to the Credentials page and click Create Credentials. Select OAuth Client ID.
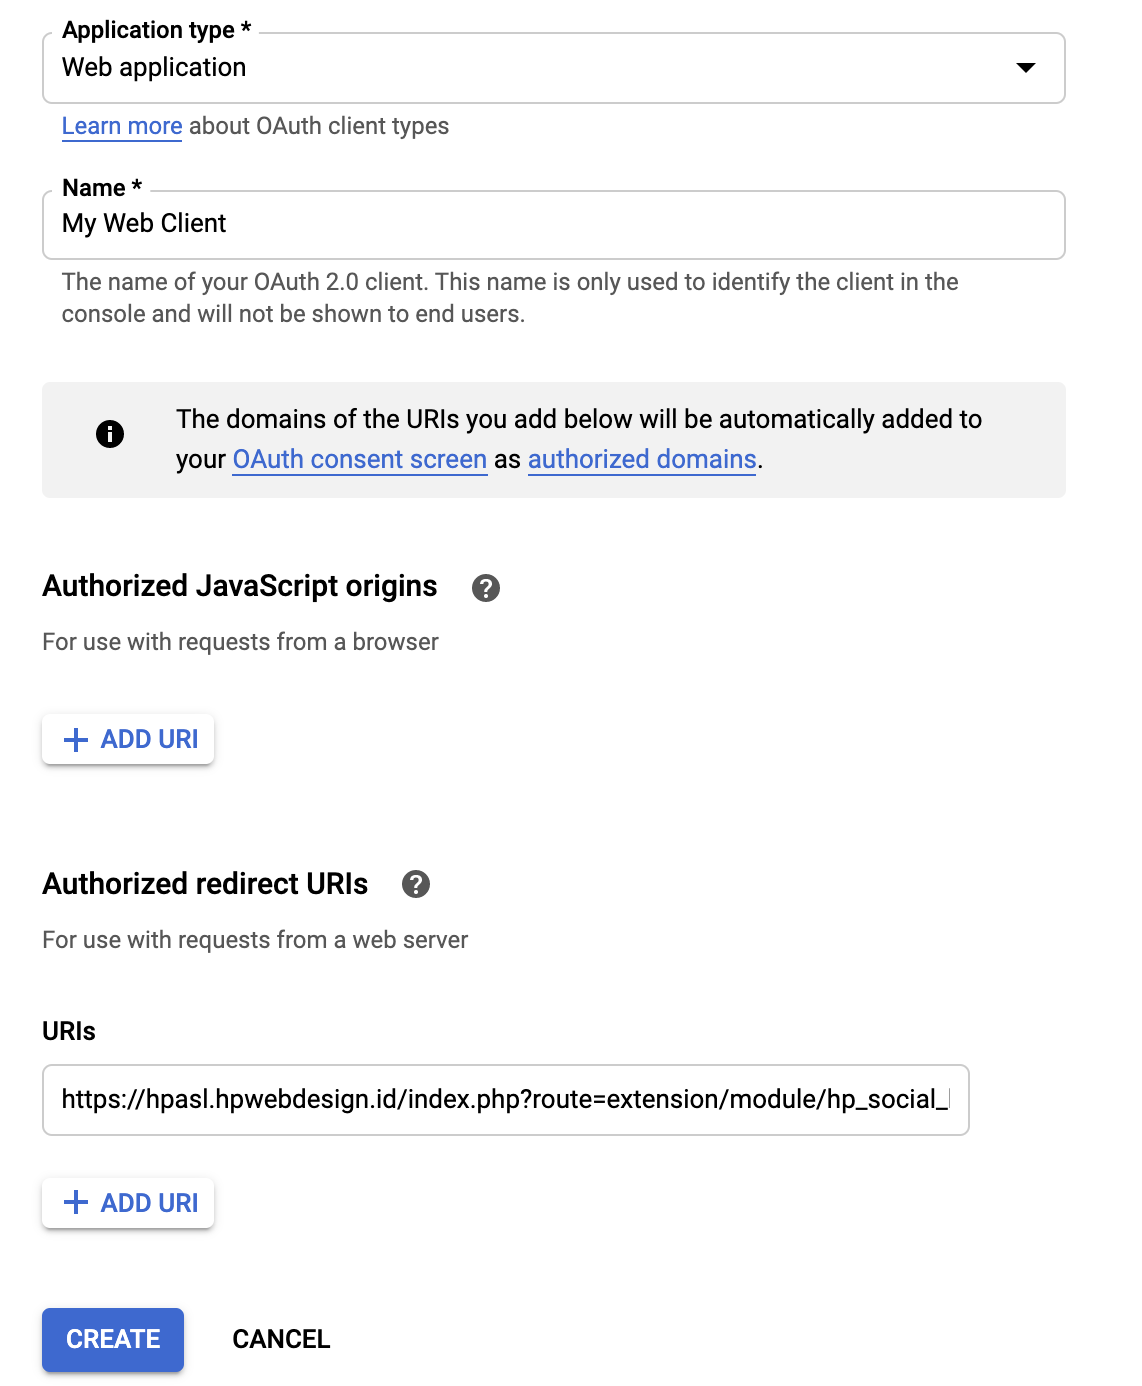
5. Select Web application in Application type and fill in URIs with :
https://{your domain}/index.php?route=delivery/hp_delivery_partner/google
Then press the Create button.
6. Copy Client ID dan Client Secret.
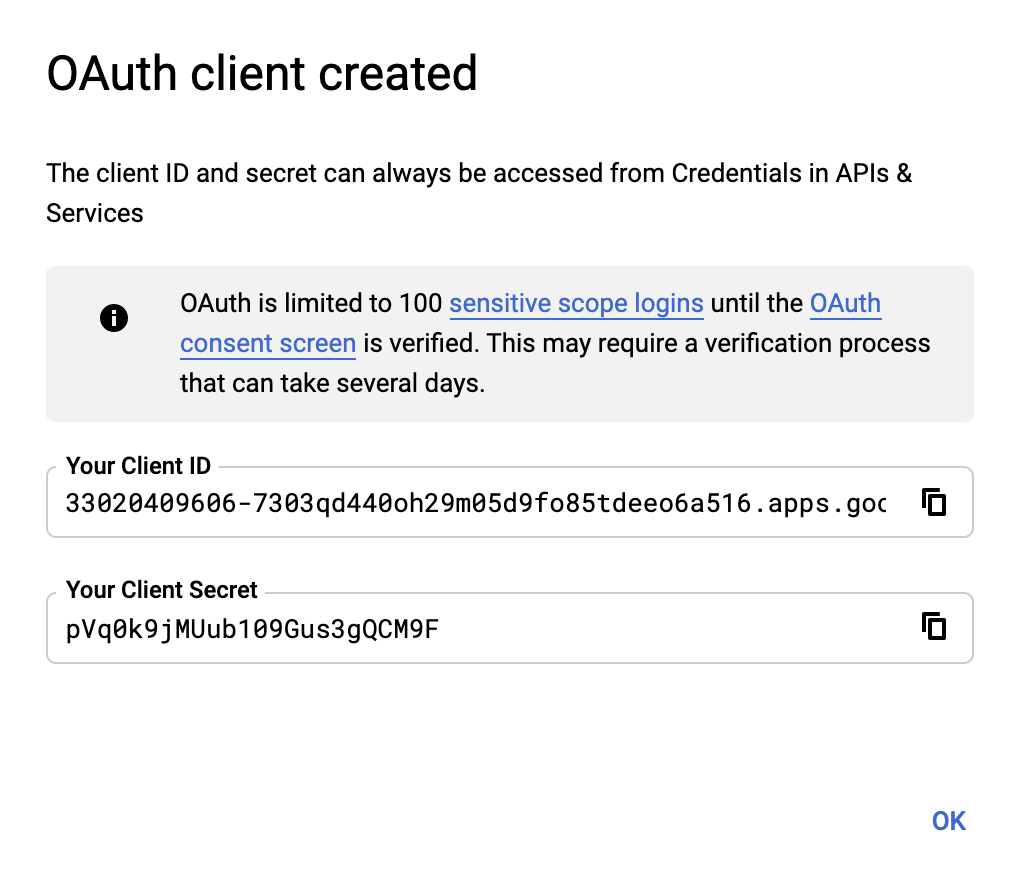
7. Return to the Hp Delivery Partners settings page and paste Client ID and Client Secret. Don't forget to set Status to On.