HP Order Tracking is an OpenCart extension that has a function to view the ongoing order process, so that the user who is placing an order can monitor to what stage the order process is. The advantage of Order Tracking is that the user who orders the goods can monitor the extent to which the shipment is made. The convenience obtained with this extension is where all the settings are only on one page. Users do not need to access multiple menus.
Pre Install
- Please follow pre install section here if you haven't proceed one before: https://hpwebdesign.io/pre-install
- After completing the above steps, you can proceed with the installation as follows:
NB: You can disable base theme modification after installation.
Installation
- Extract the HP Order Tracking module and consider the following extract. Extracted files may differ from the following images depending on OpenCart compatibility versions.
- Navigate to Extension page > Extension Installer, then upload a file named upload.ocmod.zip
NOTE
Make sure the upload process until there is a success message: Success: The extension has been installed!If an error message appears: … is using the same ID code as the one you are trying to upload! So you don't have to re-upload it.
For Update Process:
there will be a file override of the old file. Click the Continue button to continue the upload process.
- Access the Extensions menu > modifications. Then click the Refresh button at the top right, as shown in the following image.

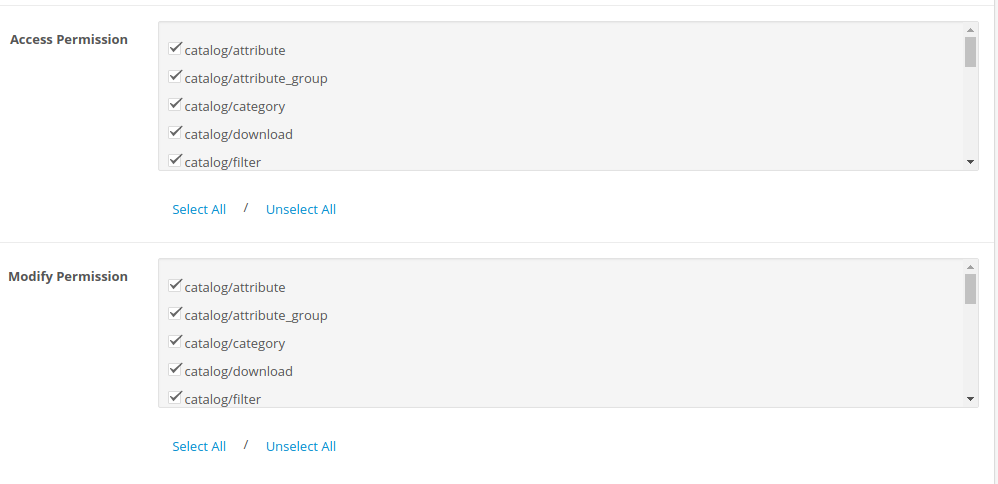
- Navigate to the System page > Users > User Groups > Click the Edit Button for Administrators. Click Select All in Access Permissions and Modify Permissions.
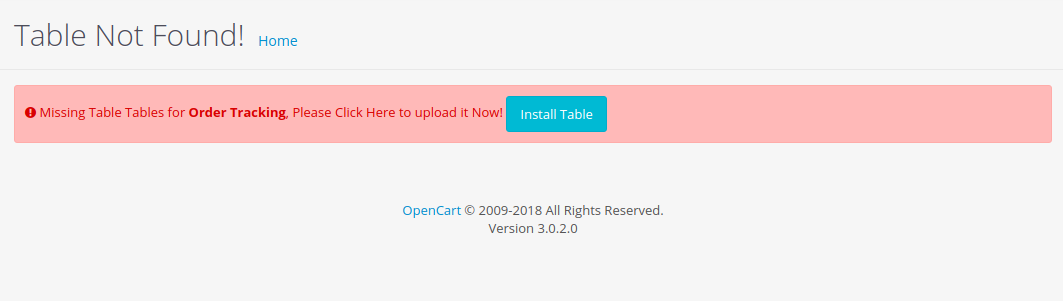
- Navigate to the HP Web Design page > HP Order Tracking. Press the Install Table button
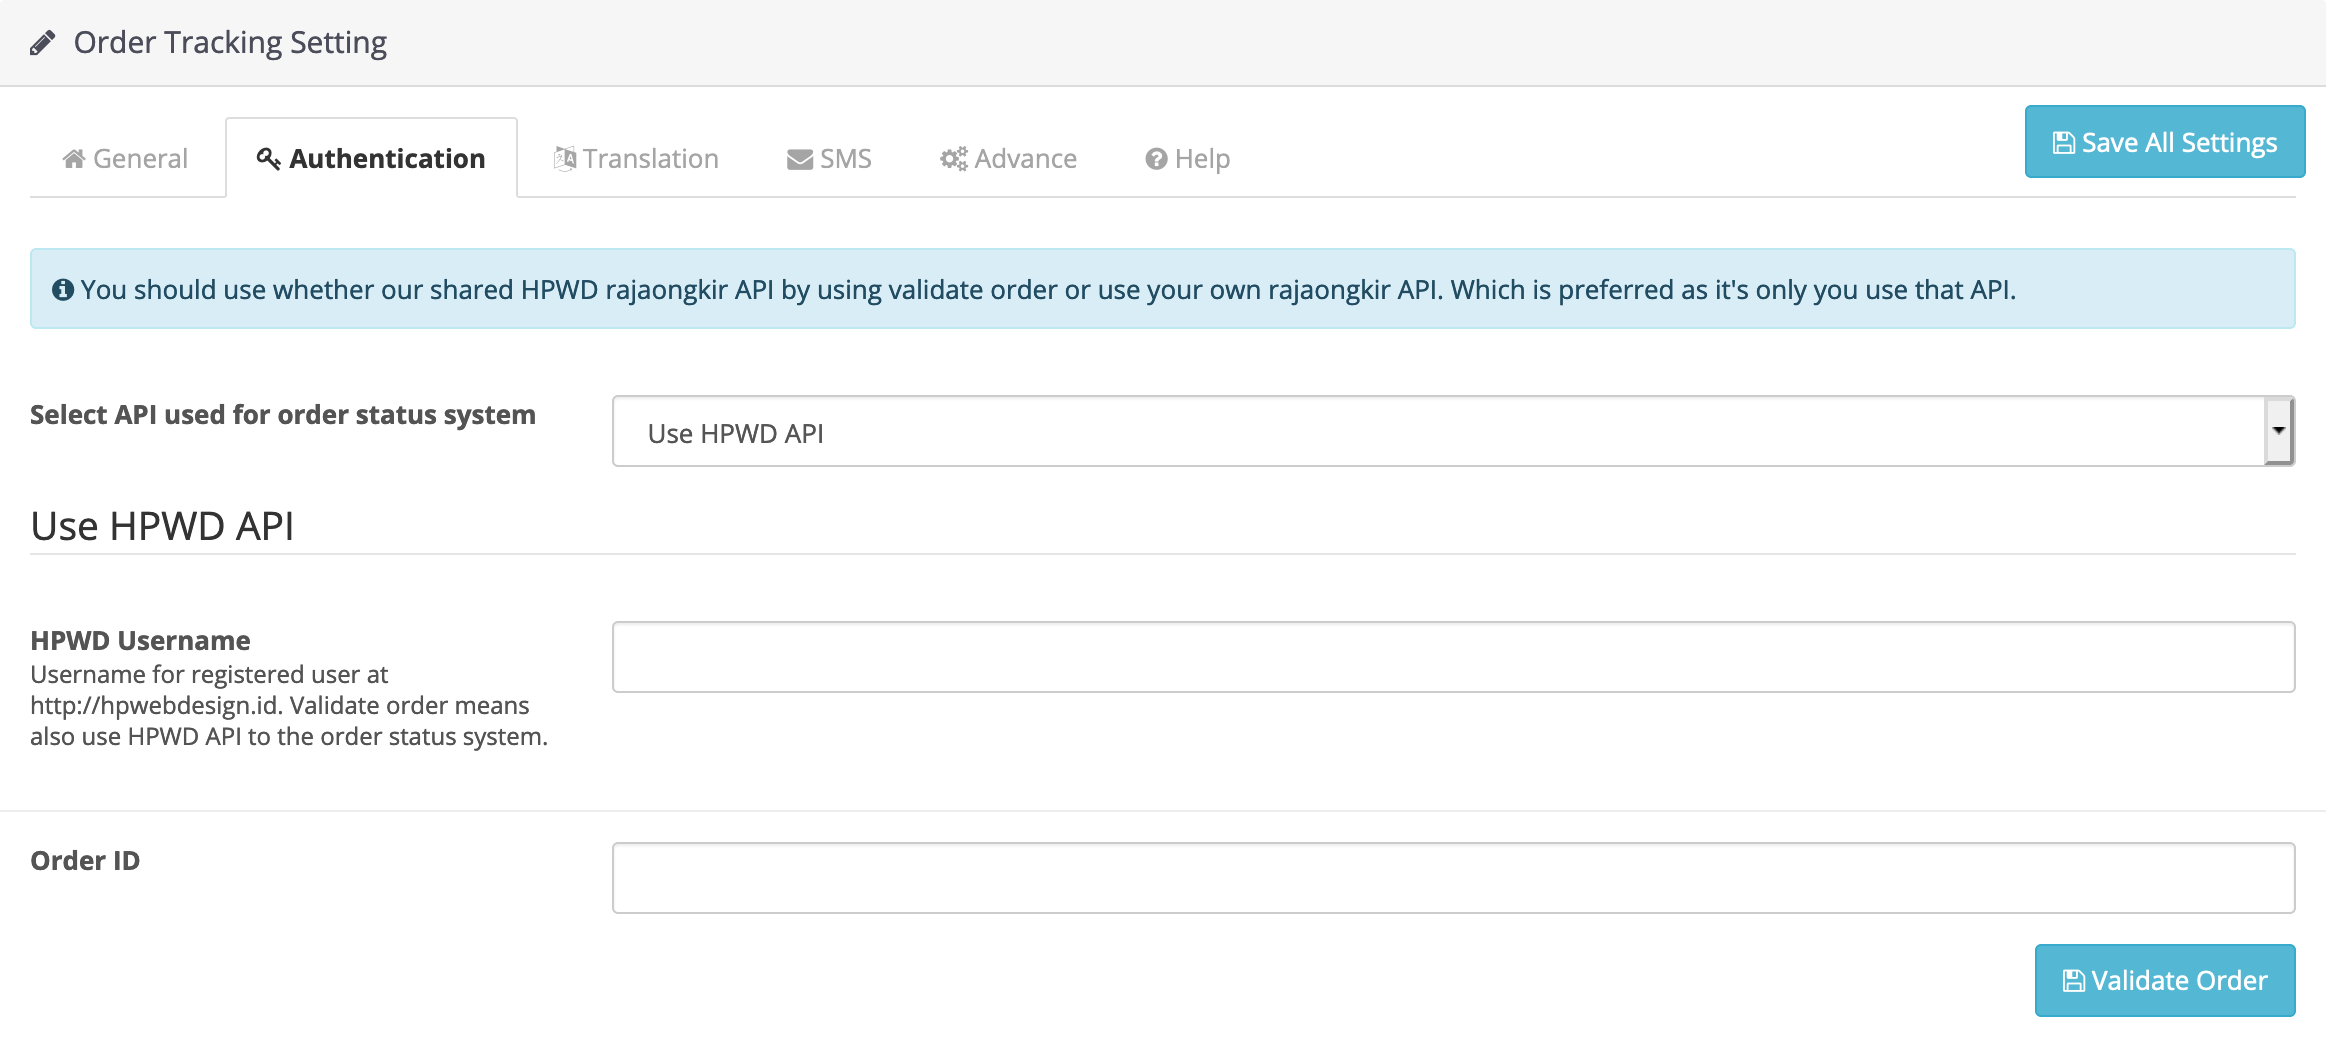
- Access the Authentication Tab and please select the method of using the API. Whether to use its own API or use the HPWD API.
- Use Your Own API : make sure you already have a PRO account at rajaongkir.com. Enter 32 API characters in the fields provided. Then click Apply API. Click Save All Settings.
- Use HPWD API : enter username and order ID which were obtained when ordering the HP Shipping Bundle. Then click Validate. Click Save All Settings. NOTE For validation when the website is online on the hosting server there is a possibility of server incompatibility which causes validation to fail. Even though the username and Order ID are correct. Please contact Email/WA support for manual validation by us.
- Go back to the General tab and fill in the form on the General tab
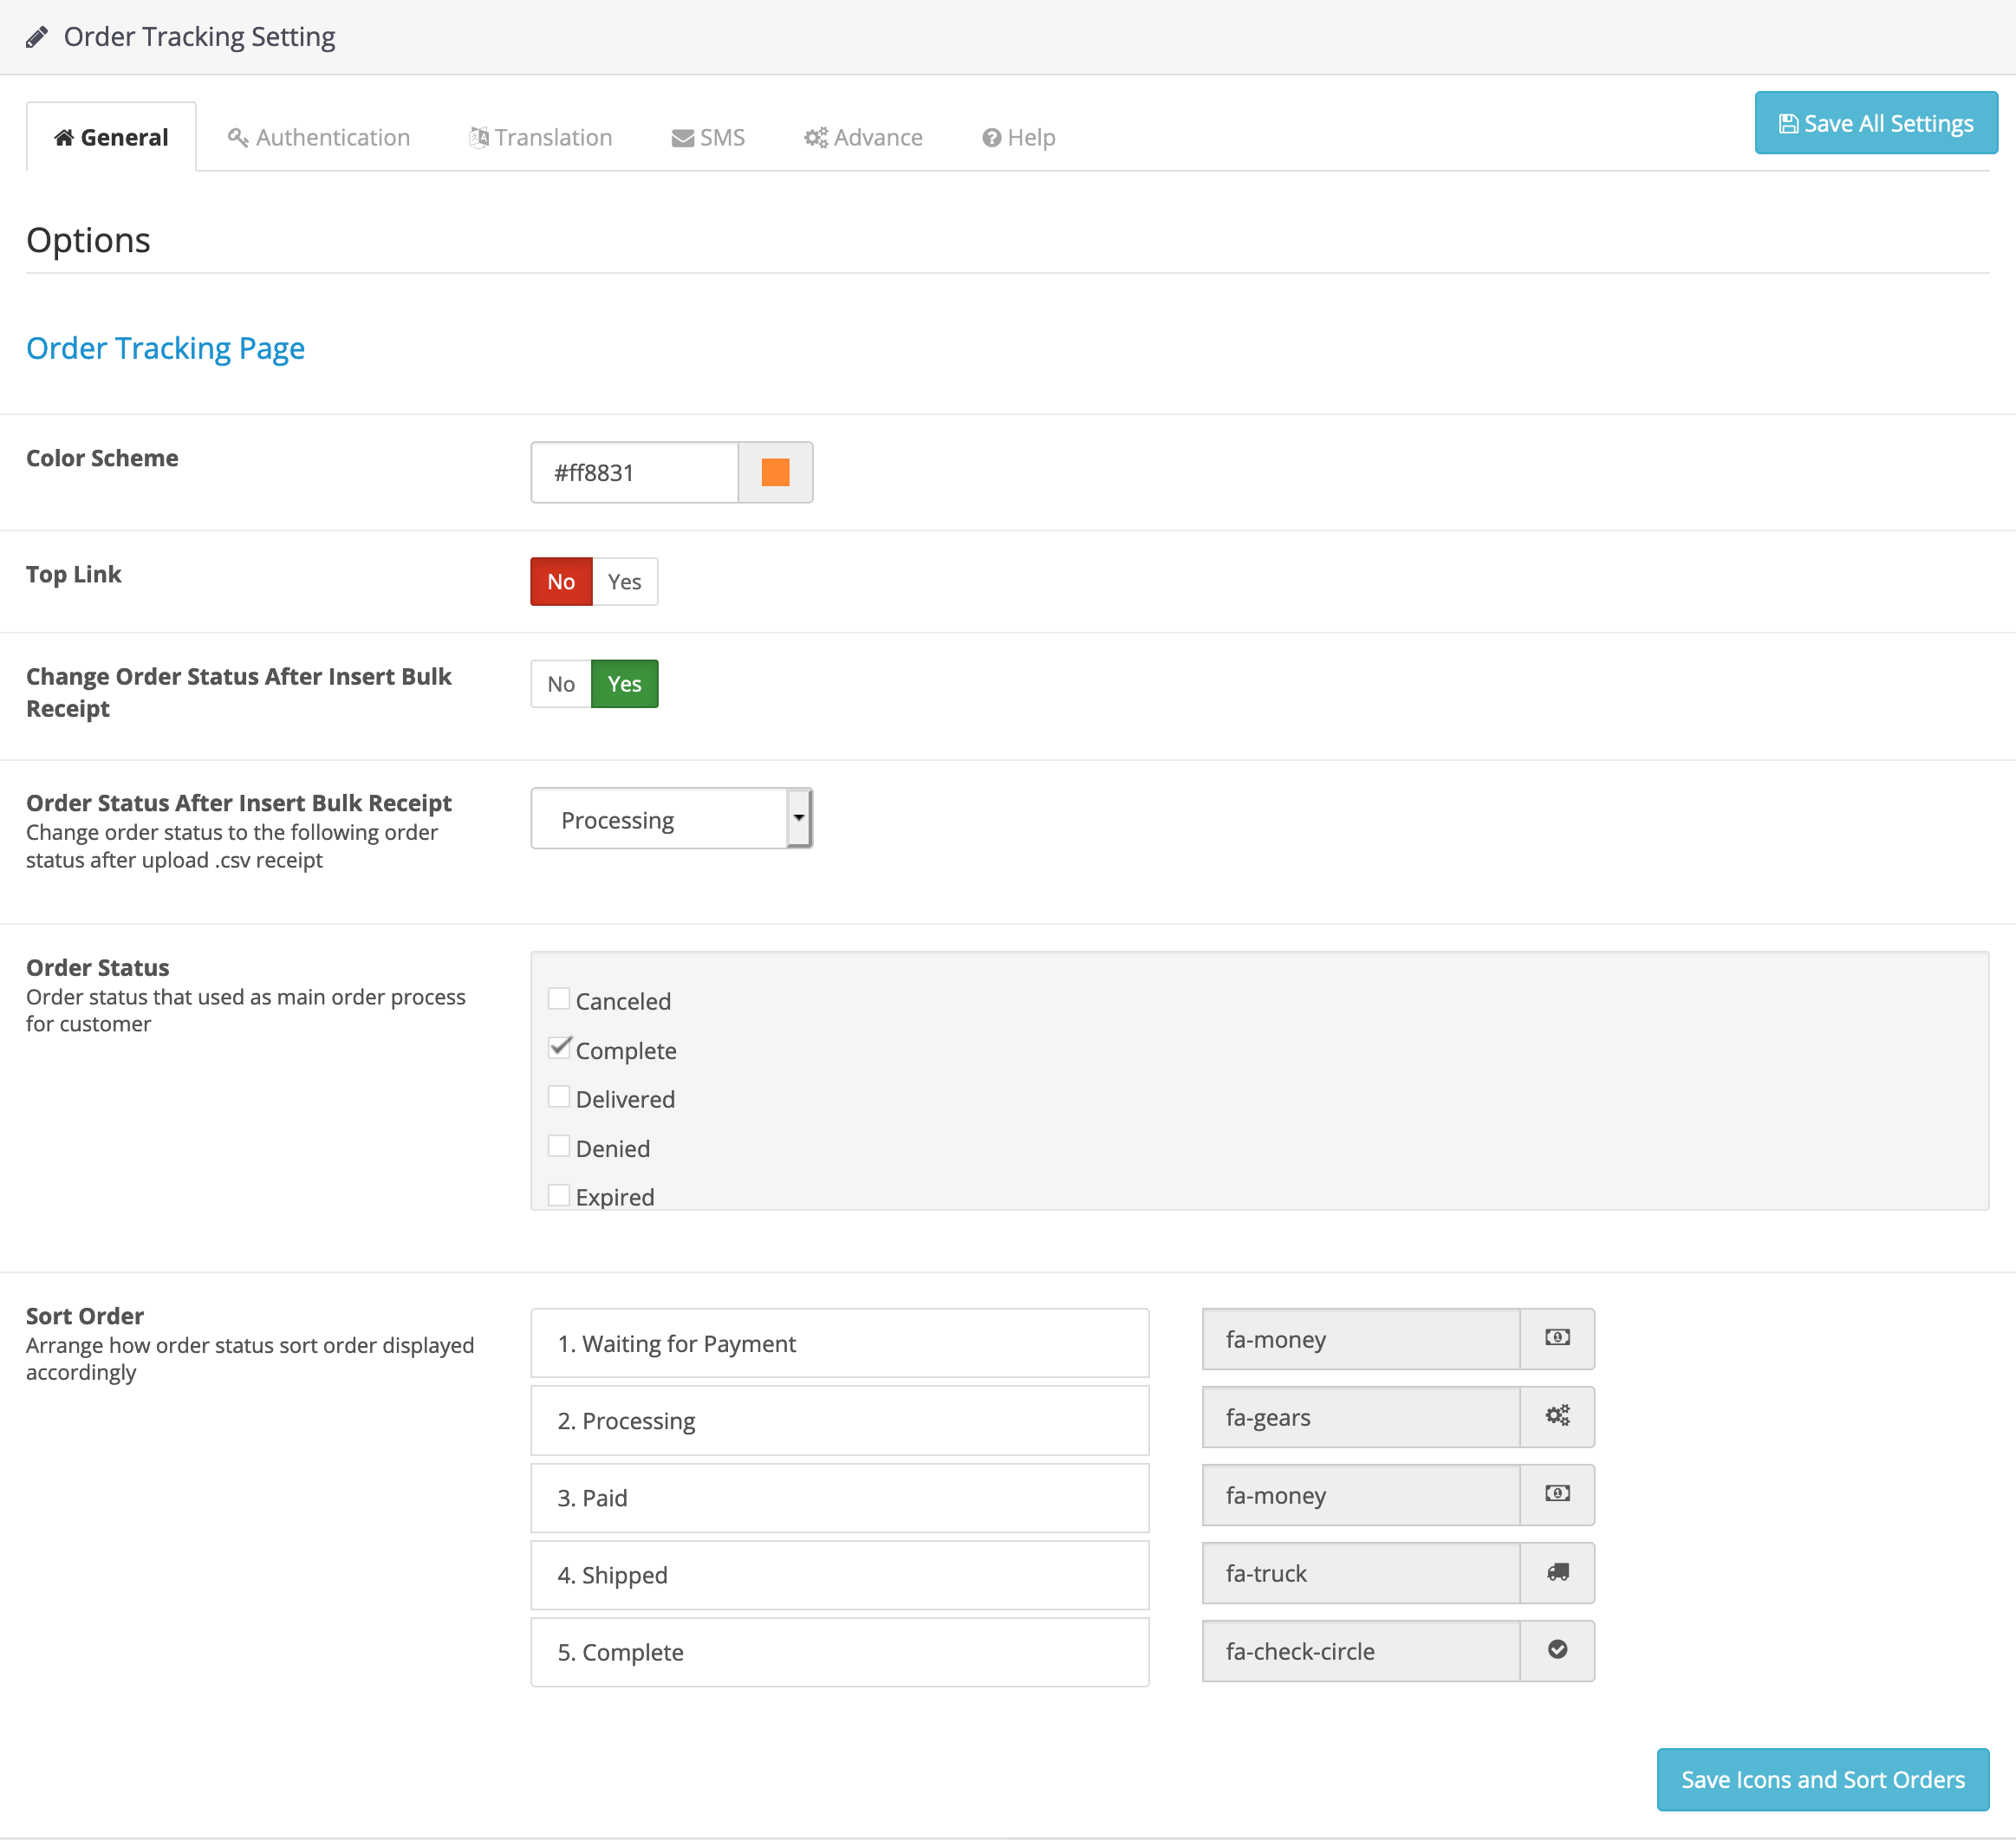
- Color Scheme : For color if the step has been done
- Top Link : To display the menu on the Homepage Header.
- Change Order Status After Insert Bulk Receipt : To change Order Status when inputting receipt.
- Order Status After Insert Bulk Receipt : For Order Status used after input receipt.
- Order Status : For order status used in Order Tracking
- Sort Order : As a sequence of steps in Order Tracking, you can also make changes to existing icons
- After setting the sort order make sure you have pressed the Save Icons and Sort Orders button, after that press the Save All Settings button
NOTE
At this point you should be able to use Order Tracking on your OpenCart system.
You can check the success of the installation by:
Order products as a customer until the checkout process, then access My Account > Order History which is usually located in the upper right corner. Then press the view button you want to see the Order Tracking
How to Enter Receipt on HP Order Tracking
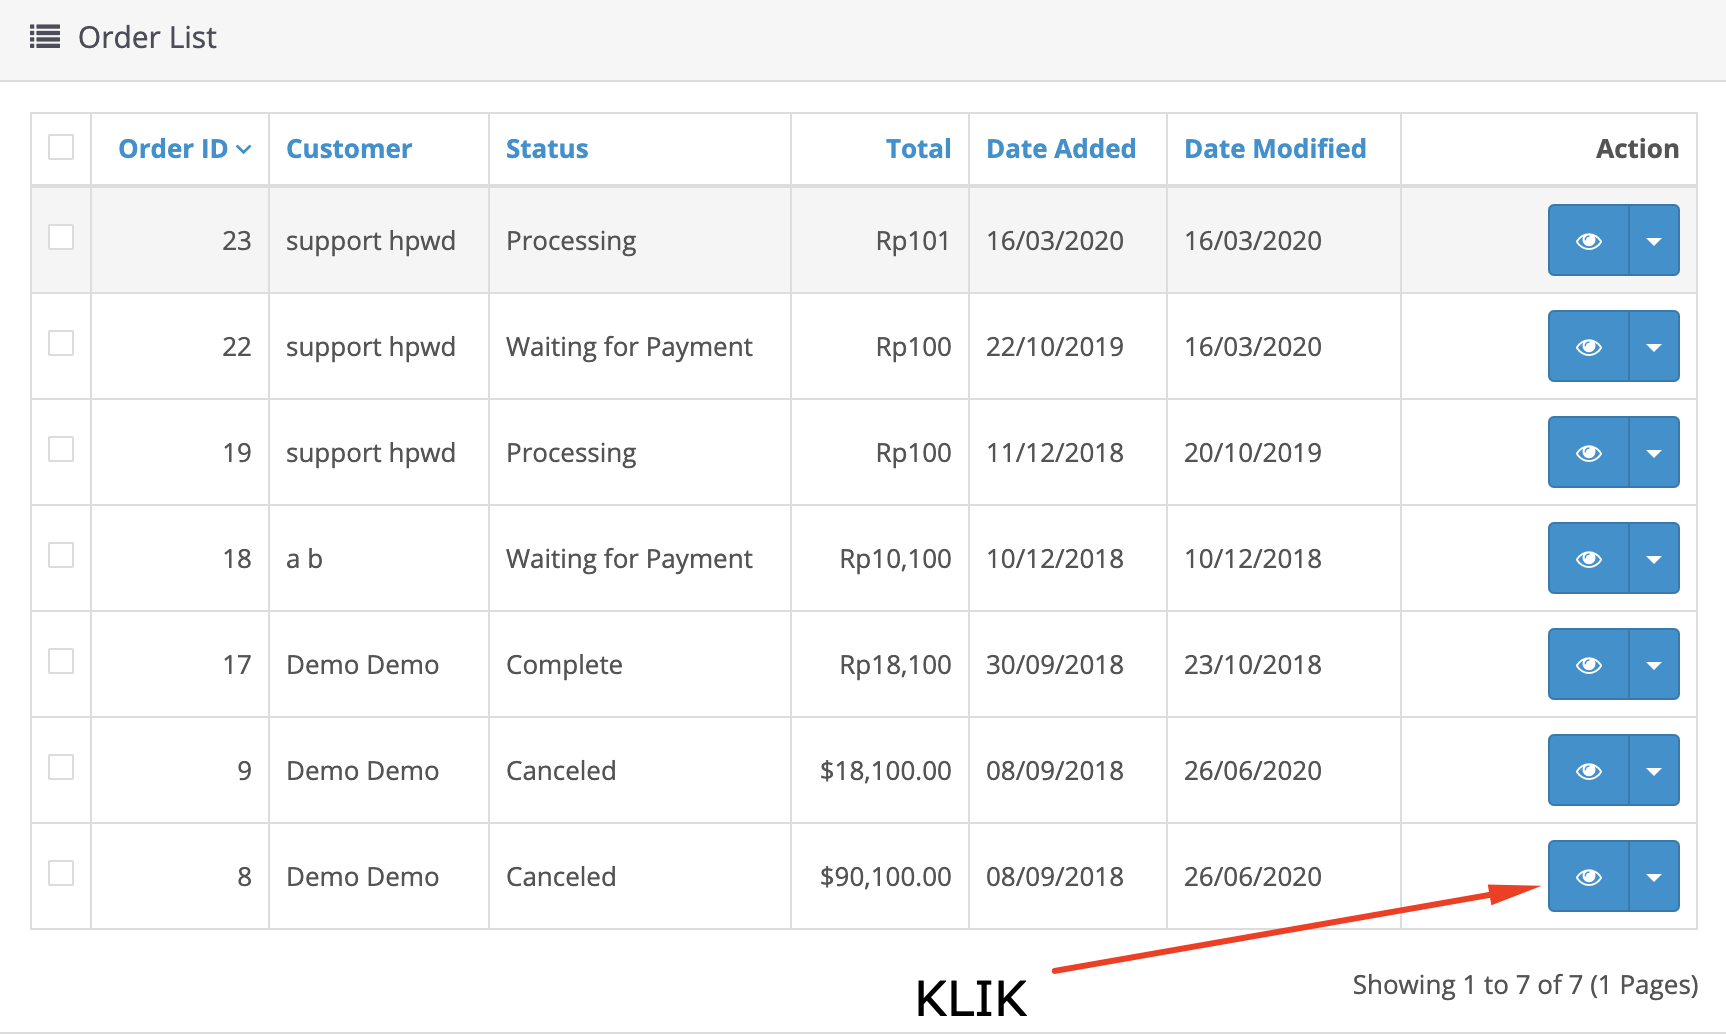
- To input receipts, first go to the Orders page in the Sales menu > Orders.
- Select the order you want to input the receipt, then click the view button.
- Scroll down and select Shipment History tab, enter Shipping Number and select Courier. After that click the Add Shipping Number button.
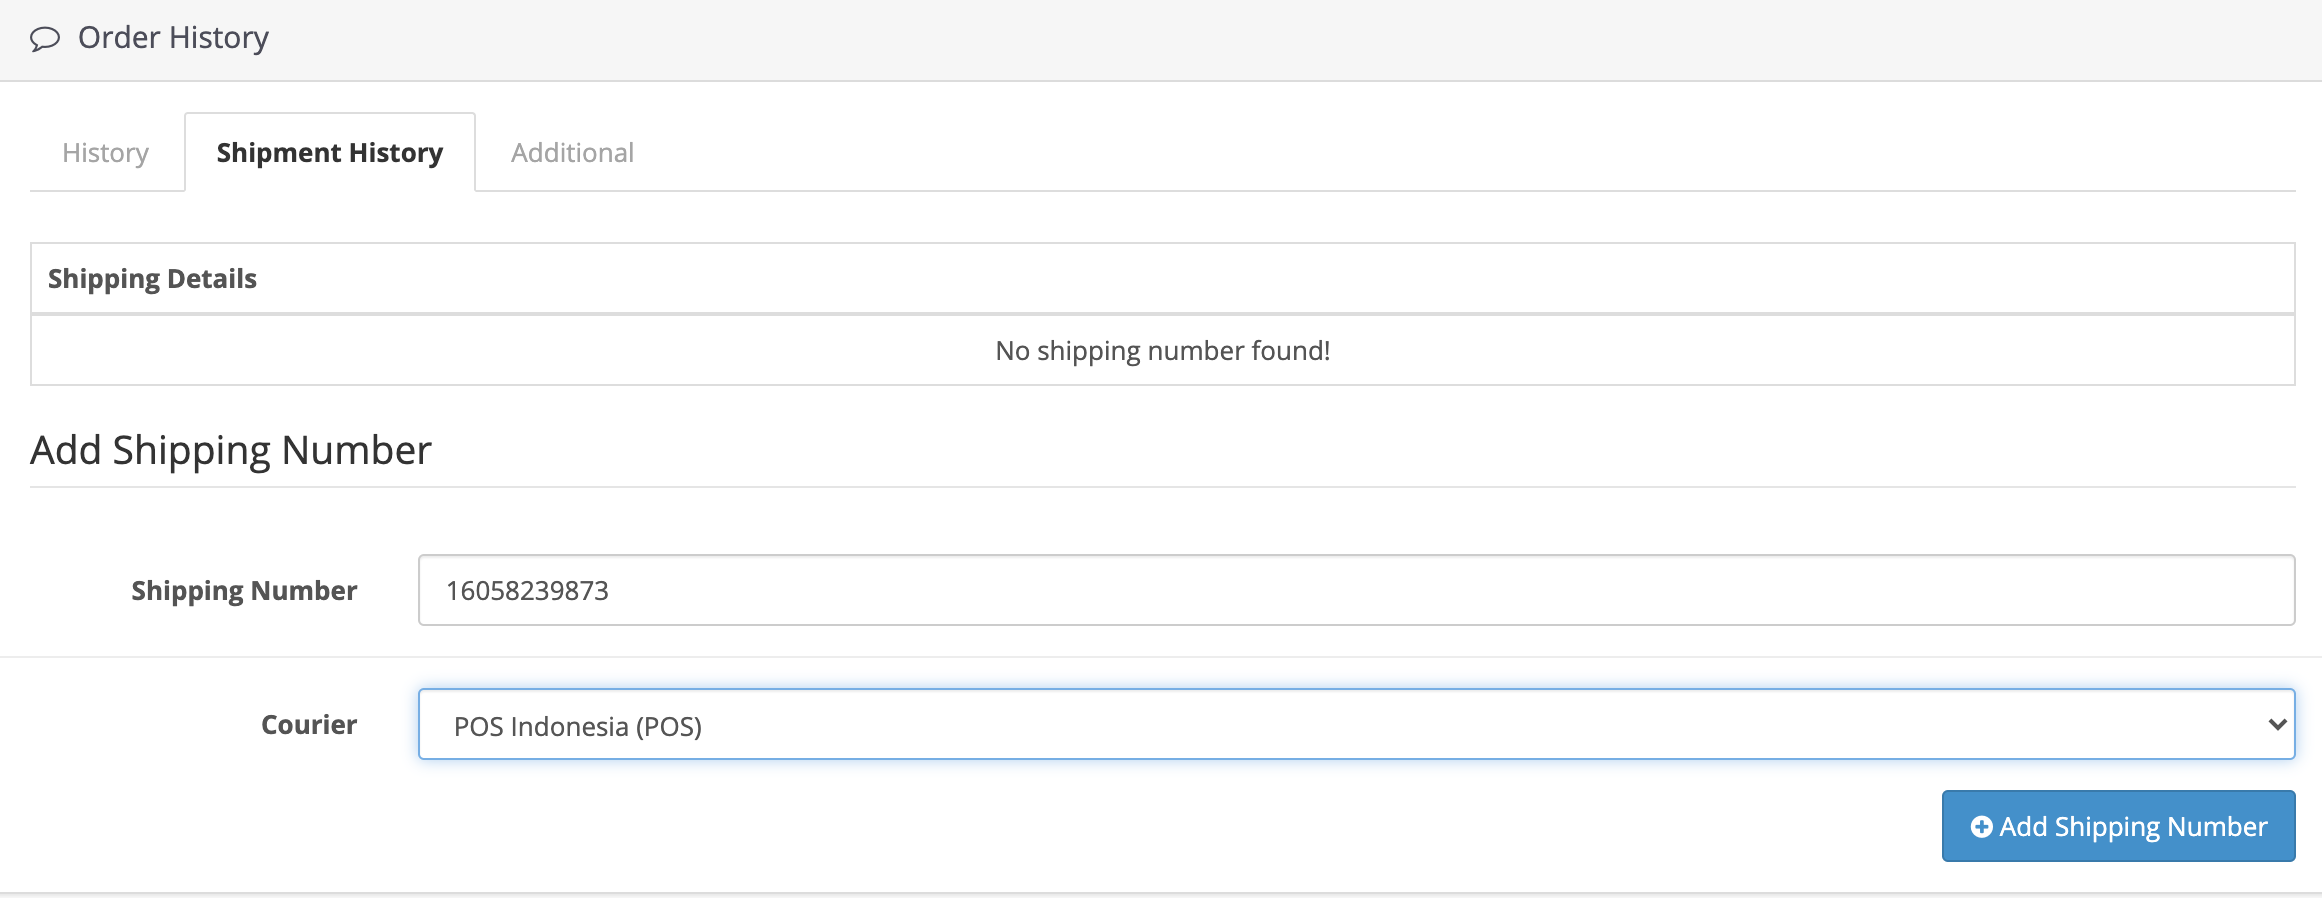
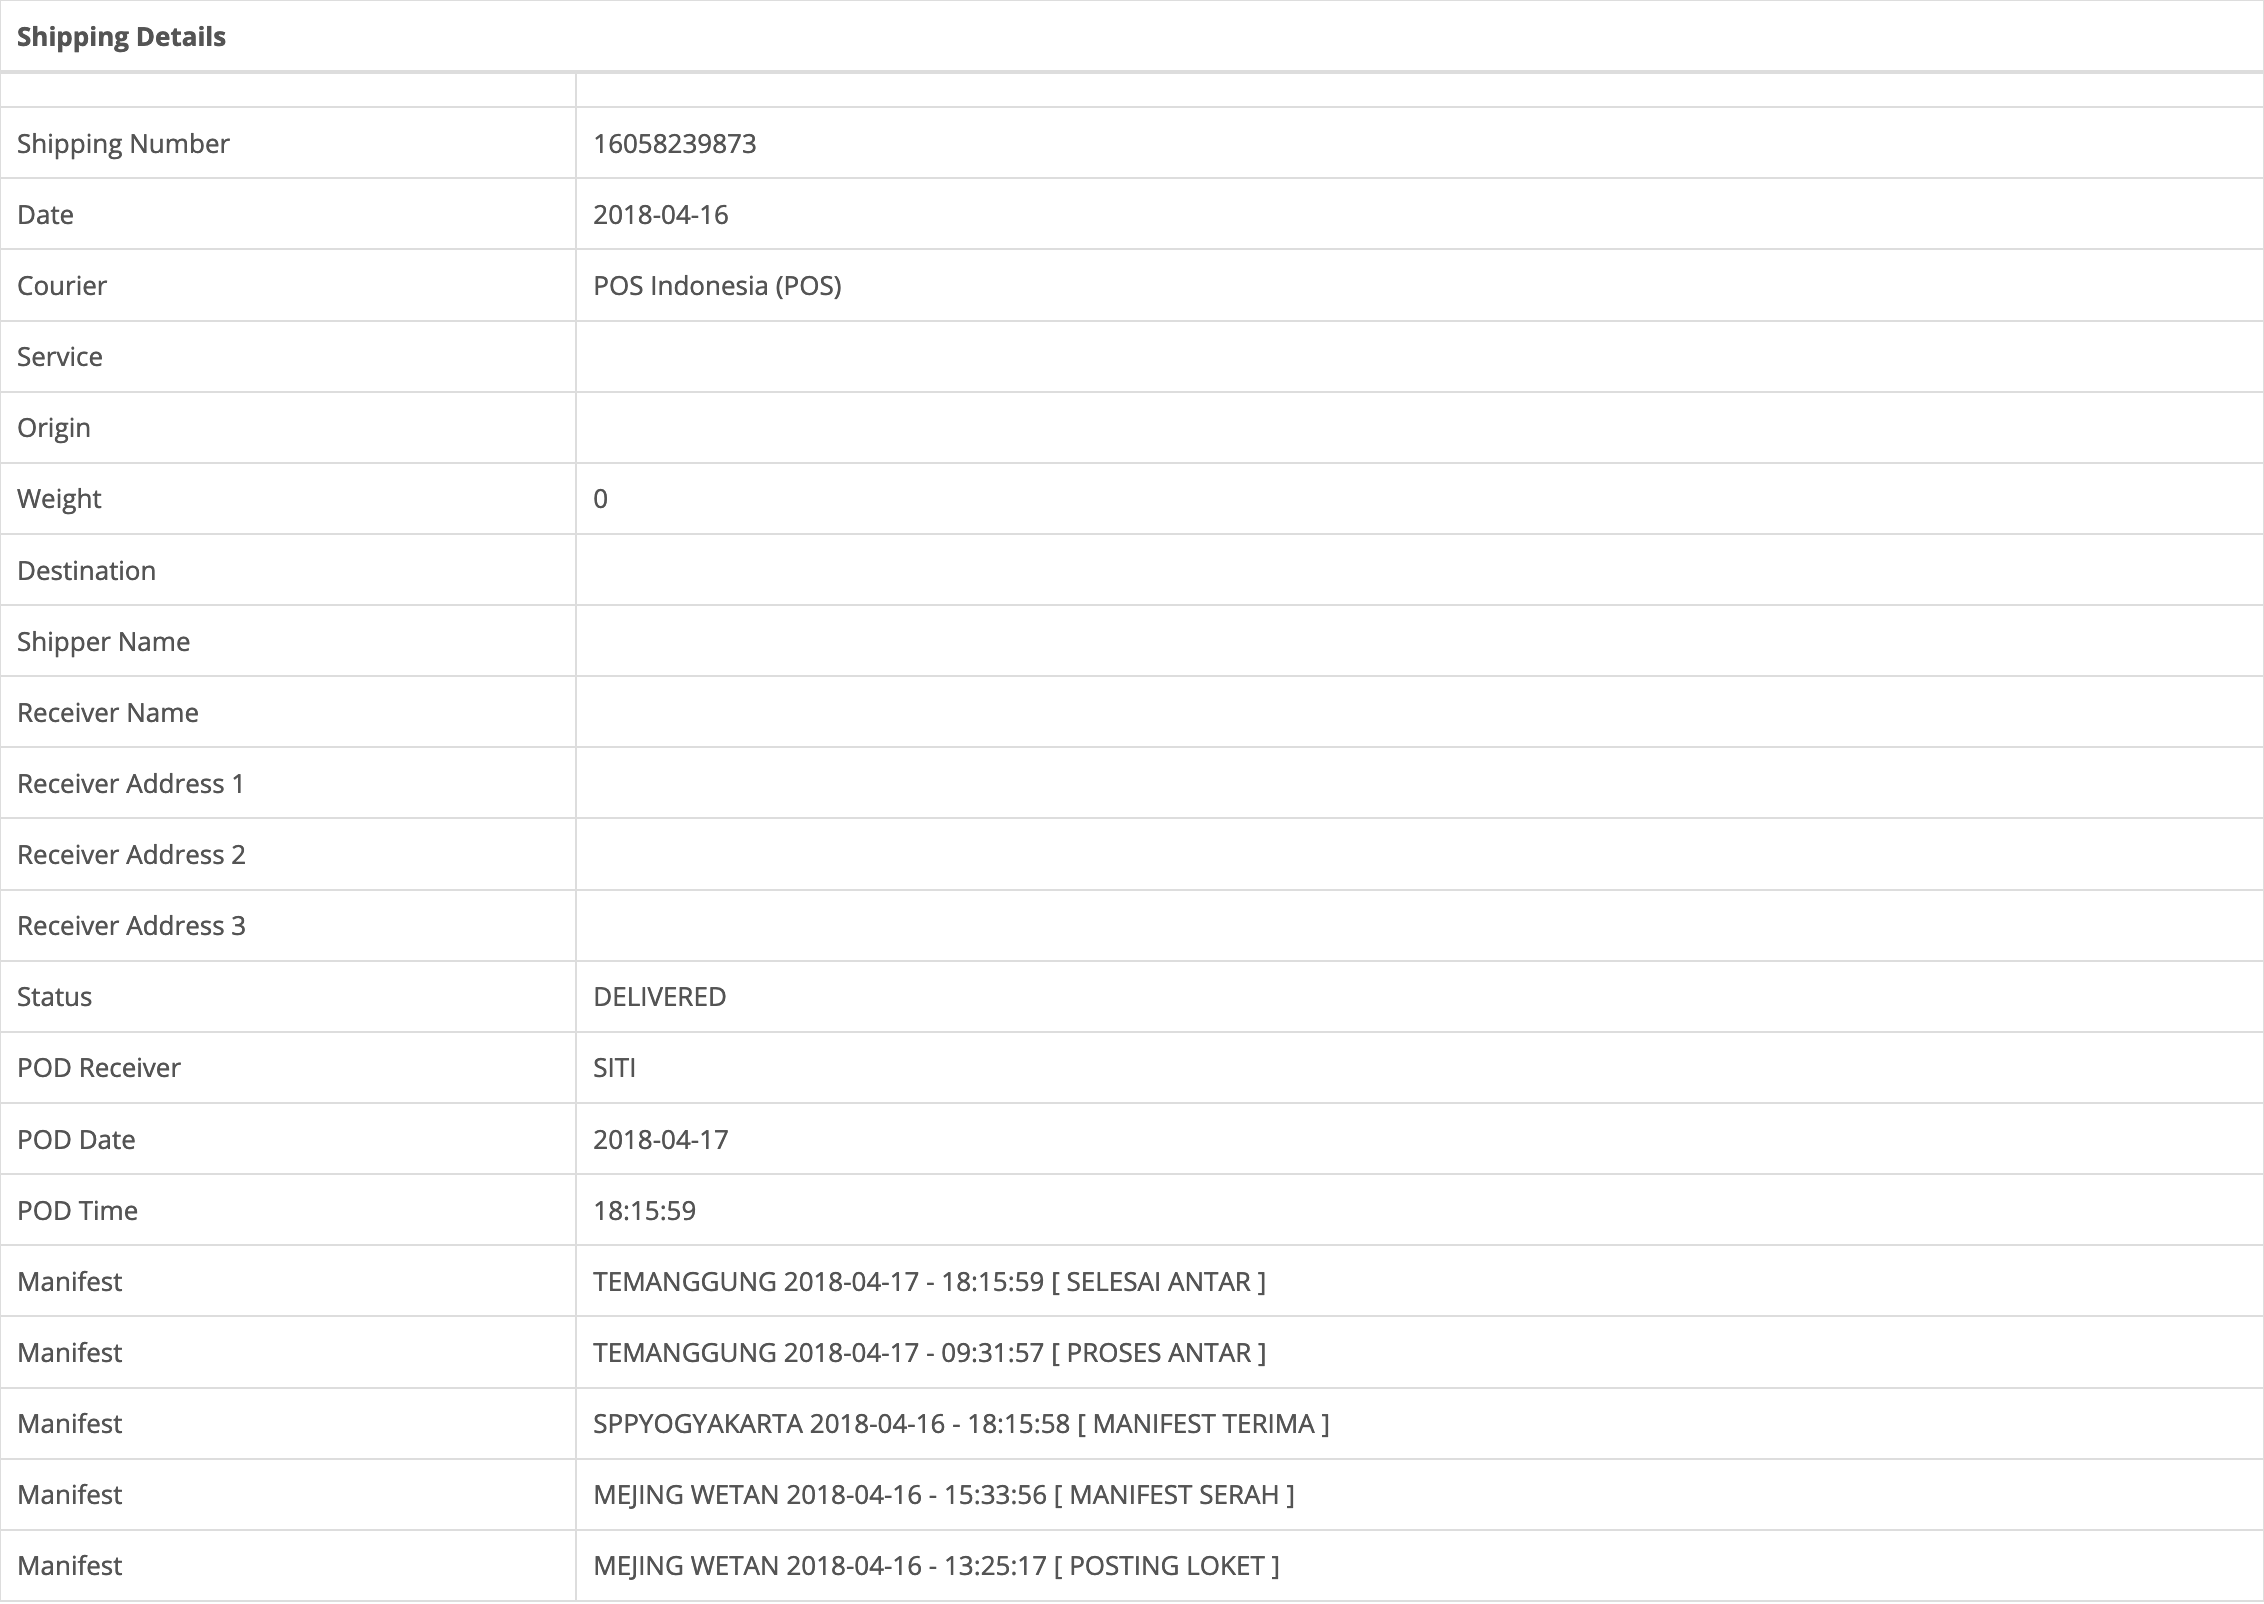
- When it is successful, the shipping data will appear in Shipping Details.
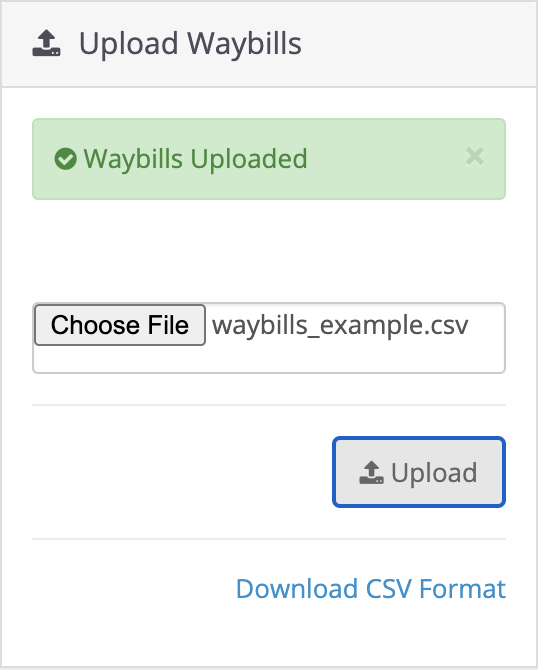
How to Enter Receipt Numbers in Bulk
- To input receipts in bulk, first go to the Orders page in the Sales menu > Orders.
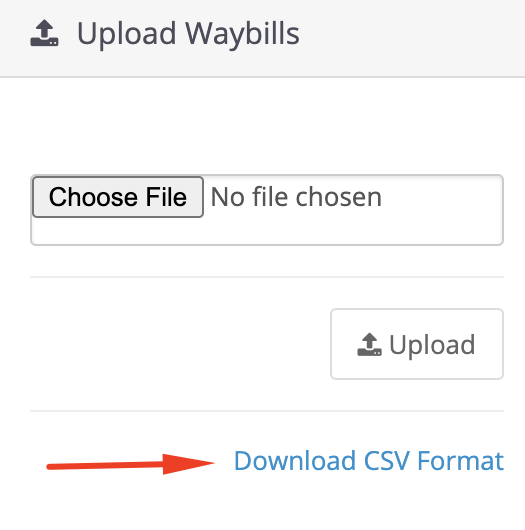
- At the bottom, there is Upload Waybills, then click Download CSV Format.
- Open the waybills_example.csv file that was downloaded earlier, then edit the data using Microsoft Excel. Don't forget to save after editing.
- Order ID : Filled with Order ID to which you want to give a receipt number
- Expedition : Filled with the courier used, for example: POS, JNE, etc.
- Receipt Number : Filled with receipt number to be inputted.
- Upload the waybills_example.csv file earlier, if the message Waybills Uploaded appears, the receipt number has been successfully entered.