
Tutorial 8 - Things You Need To Do After Installing Opencart
In this article we will share knowledge about things you need to do after installing Opencart. Theese steps configuration will be divided into 2 parts. Stay tuned for the second part on the HPWD Blog.
We know that OpenCart has a lot of built-in features that certainly we don't need all thoose features. Especially in the latest version, I mean Opencart 3. More than that, there are additional features that we must setting in order to operate properly according to online store standards in Indonesia.
This configuration includes not only the things that can be seen by the user, but more comprehensively regarding the security and performance optimization of the OpenCart system.
Things you need to do after installing Opencart :
1. Moving Storage Directory
Storage directory is the default directory in OpenCart that is used to store the internal needs of the OpenCart system. Such as cache, upload, and modification. By default this folder is located in system/storage. Of course this is not recommended because you will open a security hole.
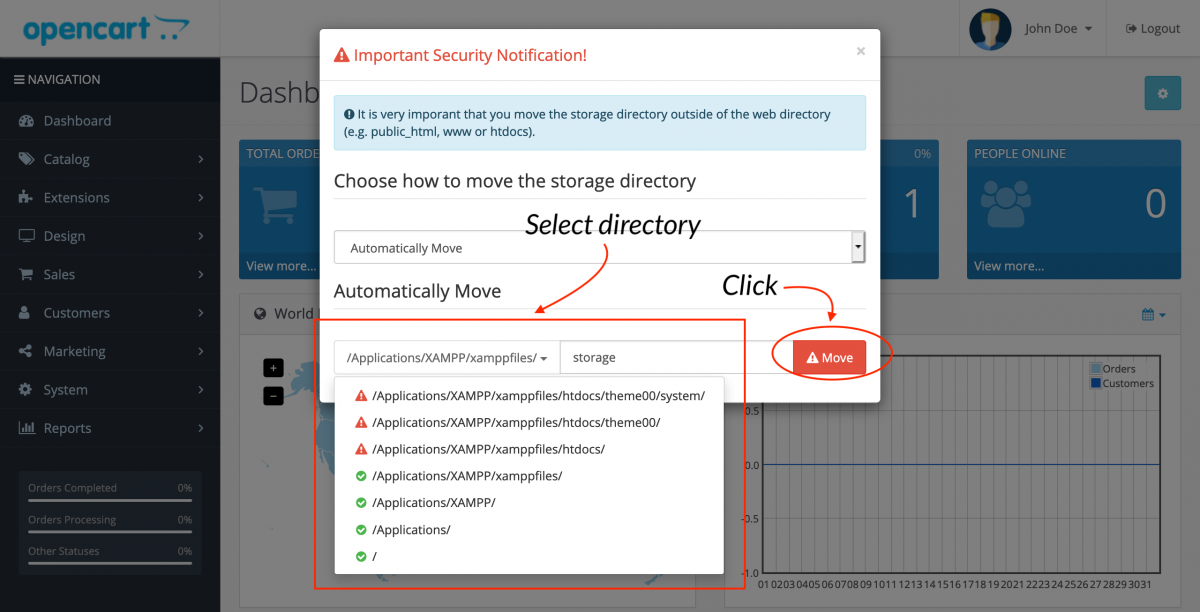
Move OpenCart Storage Folder Automatically
Specify in which folder the storage folder will be moved. Make sure the folder is writable. Login to the installed Opencart admin page and you will see a popup to automatically move. By default the system will choose a higher level directory to be the new storage folder.
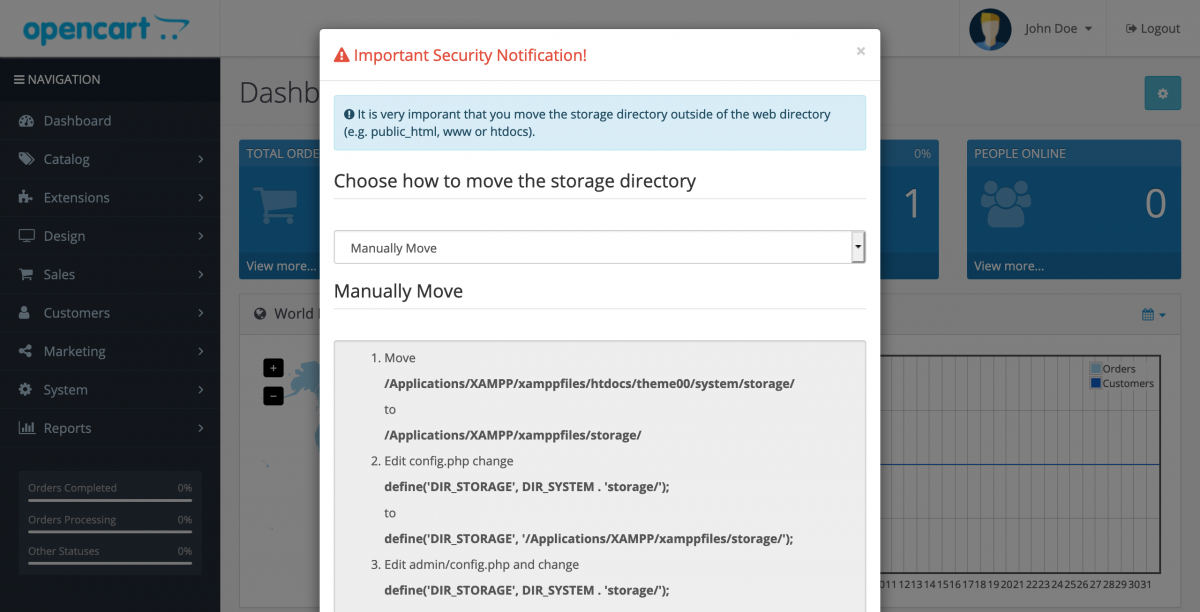
Move Openart Storage Folder Manually
This option is usually used for those of you who use VPS where directory permissions are often very strict. And the system sometimes doesn't have enough permissions to move directories automatically. Also sometimes it's faster if you use the file manager in CPanel.
1. Create another folder at the same level as public_html or a level above. 2. Copy the storage folder in system/storage to that folder. 3. Adjust DIR_STORAGE in config.php main directory and config.php admin.
You can also see the steps provided as shown below. Of course with a different path.
2. Rename Admin Directory
Another configuration that needs to do on Opencart is to rename the admin directory. This is important for secure your online store because everyone already knows that the default admin directory for Opencart is admin.
How to rename the Opencart directory is very easy. Although it seems to rename the Opencart admin directory requires a different article.
This is easier if you are in development. If you are in production, the same is true.
1. Login to the admin page.
2. Clear modification. Extensions → Modifications. Click the Clear button (Yellow Button).
3. Use the file manager to rename the admin directory. You can use the file manager in CPanel or FTP. If you're on localhost, then of course it's even easier. Rename as you wish. Make sure it's not easy to guess the directory.
4. Go to the newly renamed admin folder. Open the config.php file. Edit the phrase admin/ with a new name.
5. Log back into the admin page. Access the modification page and click refresh modification (Blue Button).
3. Optimization of Display Settings
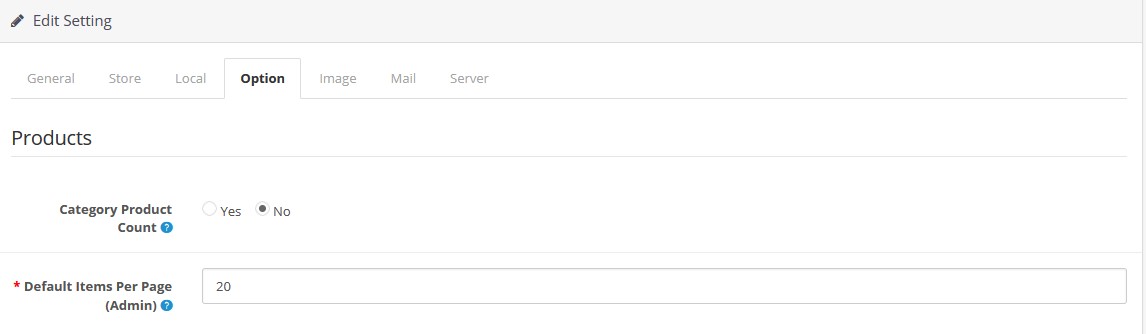
Opencart uses a lot of database processing resources when you view the category of a product. Especially if there are a lot of products in one category. The paging function will consume a lot of memory and slow down the page loading process.
How to solve this problem? Just Disable Category Product Count.
1. Access Admin Page.
2. Navigate to System → Settings. Edit Store. Select the Options Tab.
3. in Product Section → Category Product Count section. Select "No".
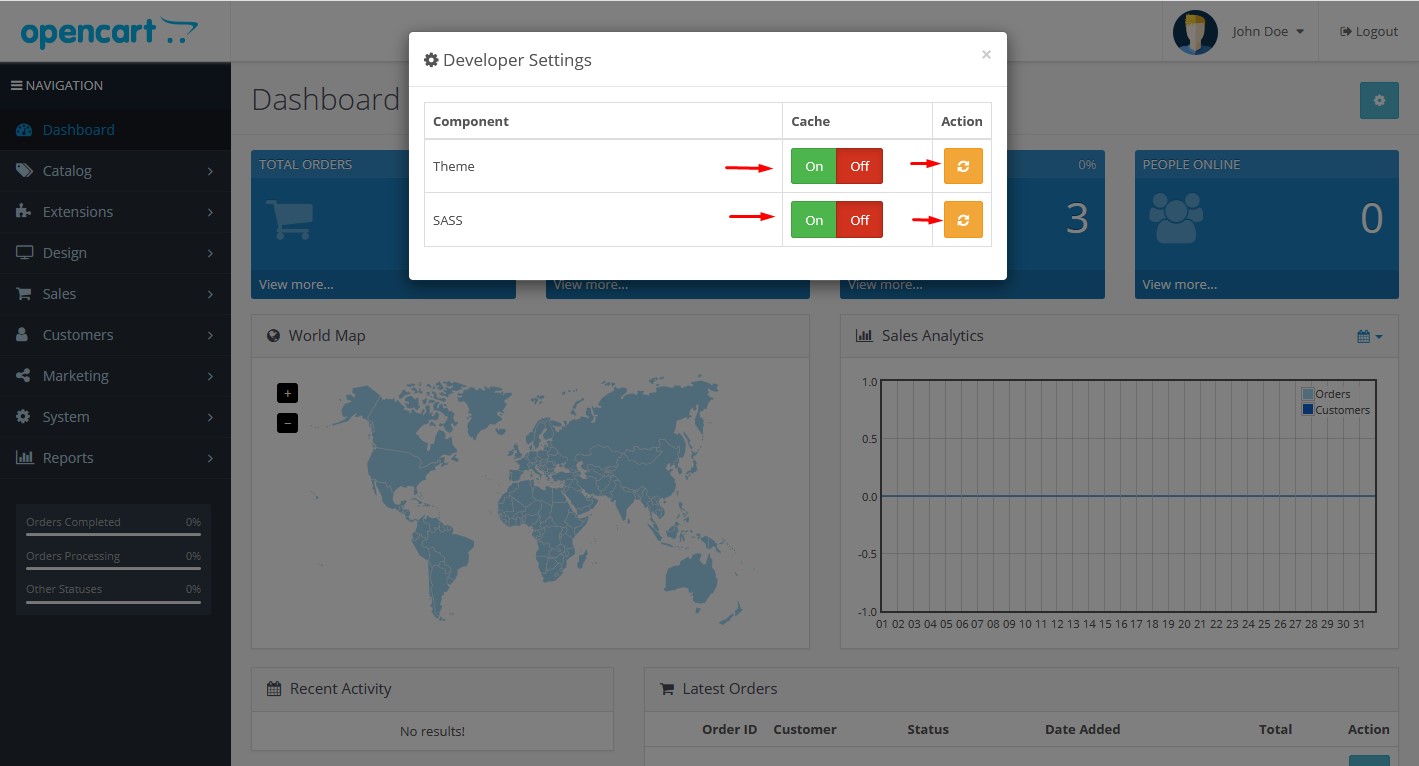
4. Enable Caching
The OpenCart system has no caching system by default until version 2.3. However, in version 3 there is a caching option with memcache. Make sure you have a module for caching if you are working on OpenCart 2.3. Or make sure to enable cache if you are using Opencart 3.
1. Access the dashboard page.
2. Click the blue button on the top right of the page.
3. Select on on the theme and sass to enable cache after that click the action button.
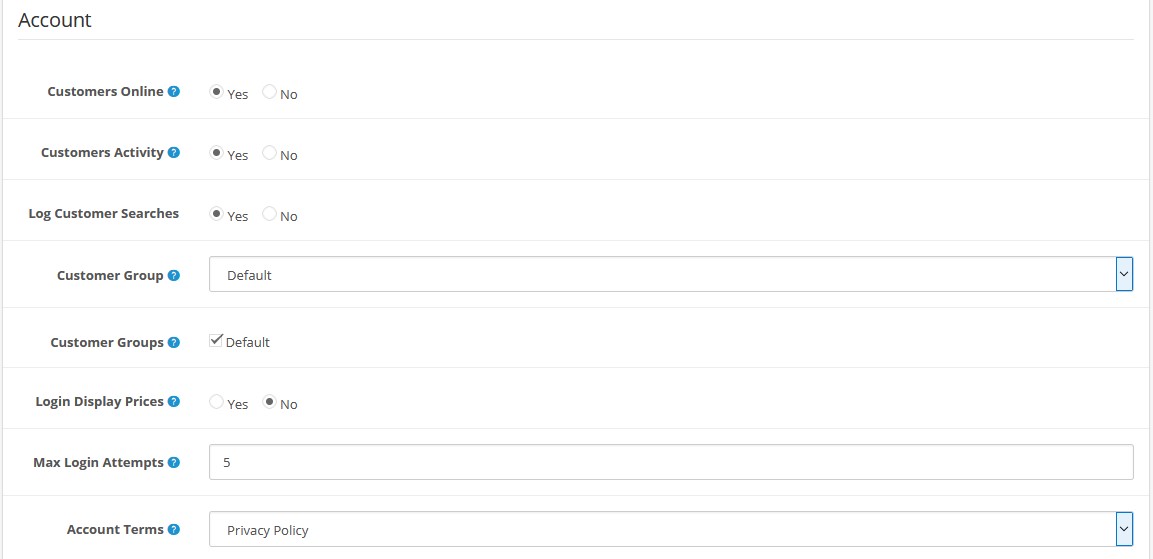
5. Enable Customer Logging/Tracking Option
This option is not enabled by default. Make sure you enable it, so you know the behavior of the customer regarding the product, delivery, etc. You can get pictures of best seller products.
This data is very important for marketing decisions. And with the help of a simple extension, you can get this data in a chart.
1. Access admin page.
2. Navigate to System → Settings. Edit Store. Select the Options Tab.
3. Account Section → Customers Online, Customers Activity, Log Customer Searches. Select "Yes".
6. Setup Google Recaptcha and Google Analytics
Google Recaptcha will help protect your Opencart Online Store from spam. Make sure to enable Recaptcha on Opencart.
For a tutorial on how to setup Google Recaptcha, you can read : How to Setup Google Recaptcha
Google analytics will help you to analyze how many visitors have visited your website. This is very important to help your Opencart store marketing.
1. Register on Google Analytics and get Code analytics.
2. Access Extensions. Filters for Analytics. Install and edit Google Analytics
3. Paste the Analytics code on the Google Analytics Code form.
4. Change the status to Enable.
5. Save
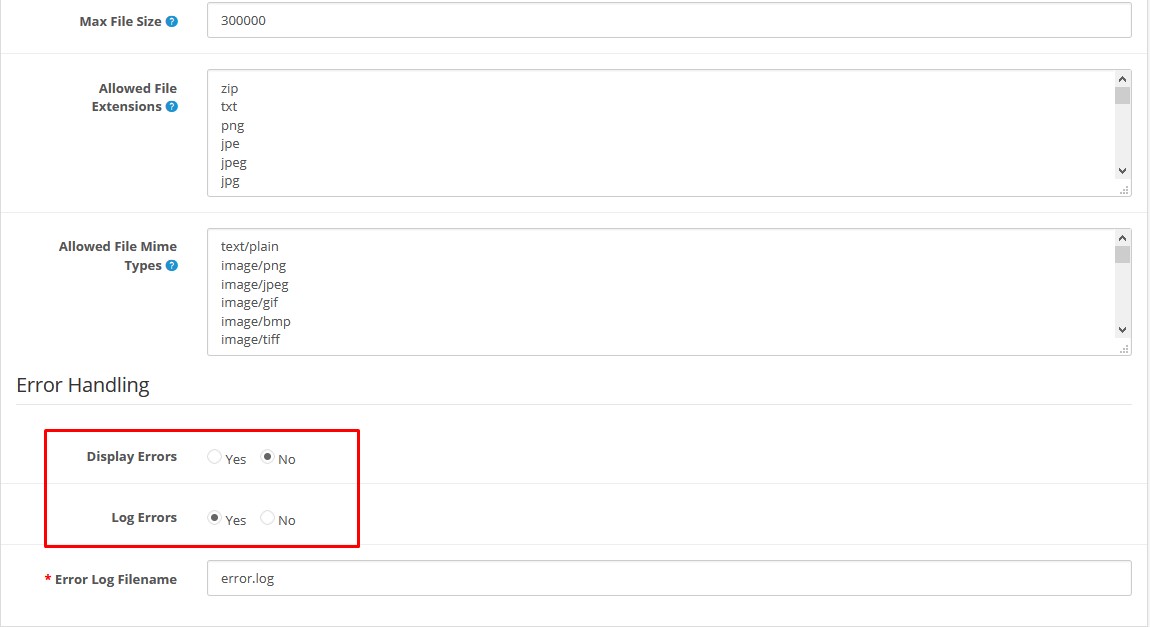
7. Display Errors
Hiding errors in your Opencart store is very important for the security of your opencart, the error status if it's visible on your website is very dangerous and can be used by hackers to enter your website illegally. You can Disabled the Display Errors with following these steps :
1. Access admin page
2. Navigate to System → Settings. Edit Store. Select the Servers Tab.
3. in the Error Handling → Display Errors section. Select "No". For Log Errors, select "Yes".
Thanks for reading this article!
Related Blog